Workflow Builder is the visual editor where you compose if-this-then-that automations across Jobs, Customers, Invoices, and Conversations — without writing code. Drag triggers and actions onto a canvas, connect them, set conditions, hit Activate. This guide walks you through the editor anatomy, the five built-in templates, and the patterns that pay for themselves the fastest.
Estimated time: 10 minutes
Before You Begin
- Owner, Tenant Administrator, or any role with Manage Workflows permission (Roles, Permissions, and Security)
- A clear trigger → outcome in mind (e.g. “when an invoice is 7 days overdue, send a reminder text”) — Workflow Builder is more useful when you start with the desired outcome
- (Optional) Voice AI and AI Settings configured (Setting Up Voice AI) so message-related workflows have somewhere to send
Step 1: Open Workflow Builder
Click the Workflow Builder entry in the left sidebar (the lightning-bolt icon under Operations), or navigate directly to /workflows. The page header reads “Design and automate your business processes with visual workflows” and shows three top-of-page counters:
- Templates Available — pre-built workflows you can clone
- Active — workflows currently firing in production
- Running Workflows / Total Nodes — operational scale at a glance
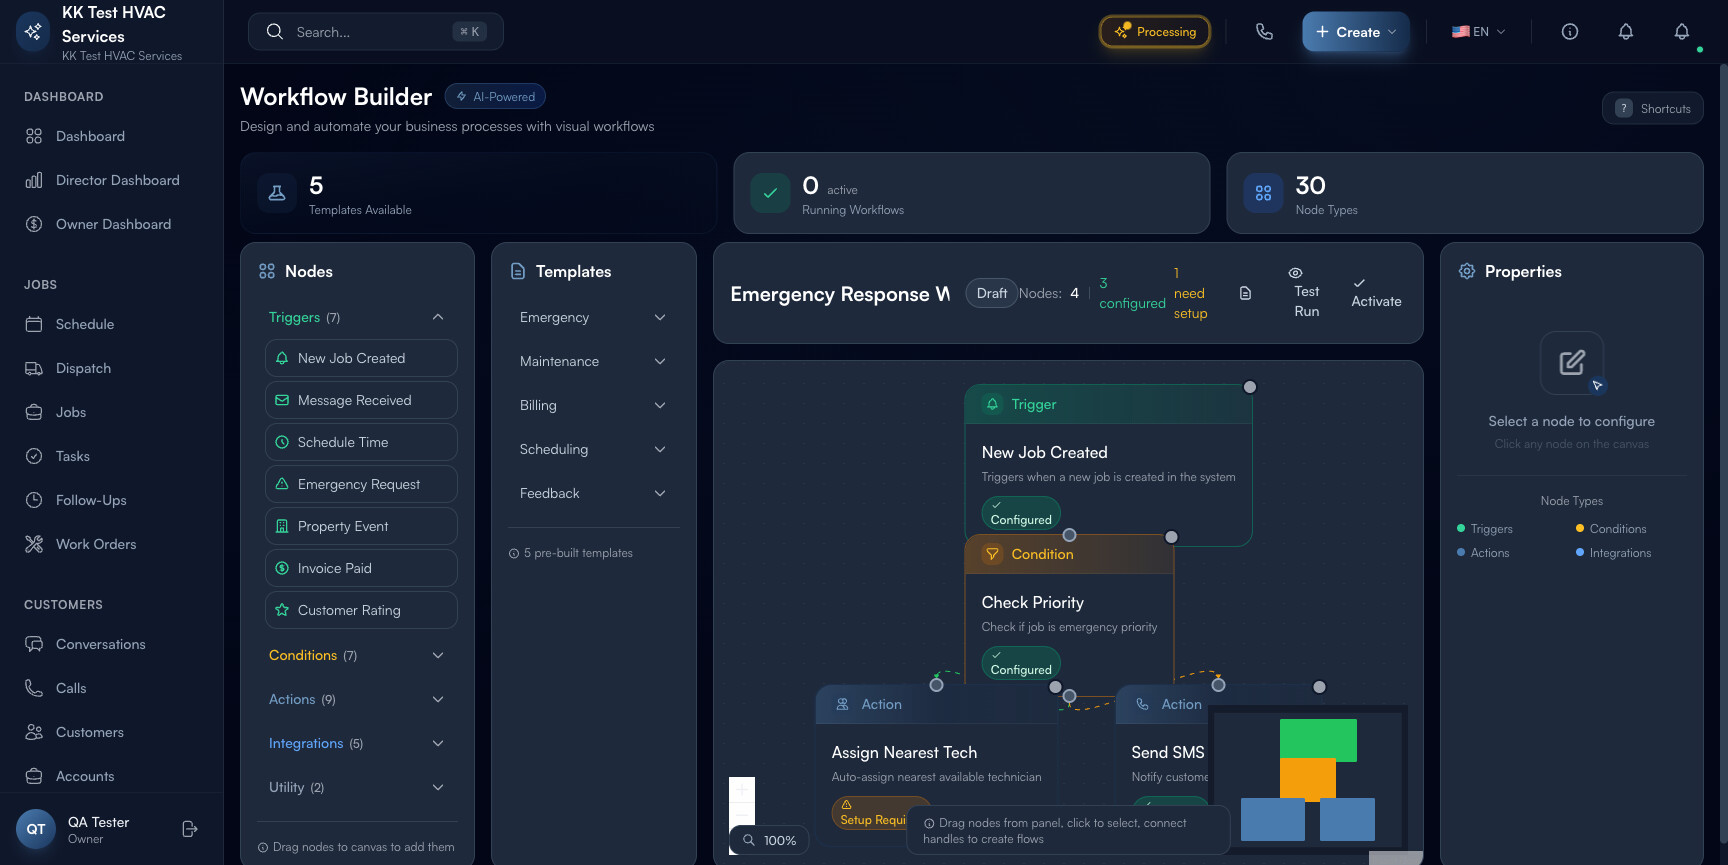
The page is a full-screen visual editor split into three vertical zones:
- Left rail — Node Types (Triggers / Conditions / Actions / Integrations / Utility) and Templates
- Center — the canvas where you drag nodes and connect them
- Right rail — Properties panel (configures whichever node is currently selected)
Step 2: Understand the Node Types
The left rail’s Nodes section is your palette. Five categories, each expandable:
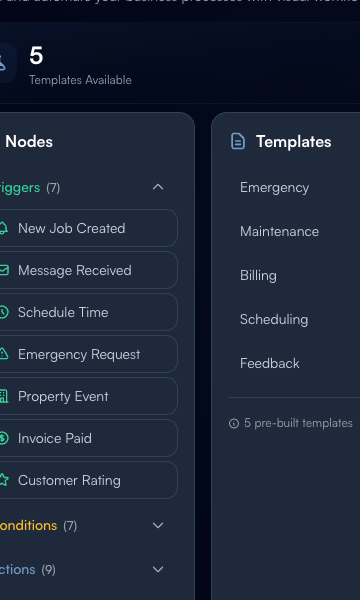
- Triggers (7) — events that start a workflow
- New Job Created, Message Received, Schedule Time (cron-like), Emergency Request, Property Event, Invoice Paid, Customer Rating
- Conditions (7) — branching logic
- Job priority check, customer segment check, time-window check, technician skill check, etc.
- Actions (9) — the things workflows actually do
- Send SMS, send email, assign technician, create follow-up, update job status, create task, send to AI, mark for review, generate invoice
- Integrations (5) — external system calls
- Google Calendar event, QuickBooks sync, Stripe charge, Thumbtack lead pull, webhook
- Utility (2) — flow control
- Delay (wait N minutes/hours/days), Logger (record to audit log without taking action)
Drag any node onto the canvas to add it. Connect them by drawing a line from one node’s output port to another’s input port.
Tip: Every workflow starts with exactly one Trigger and ends with at least one Action. Conditions branch the flow; Utilities pause it. If your workflow has no Action node, it’s an audit-log entry — useful for debugging, useless in production.
Step 3: Use a Template (recommended for your first workflow)
Right of the Nodes palette is the Templates column with five categories:
- Emergency — “when an emergency call comes in, route to nearest tech, text the customer with ETA, alert dispatcher”
- Maintenance — “every quarter, generate preventive-maintenance work orders for all customers with active service contracts”
- Billing — “when invoice hits 7 days overdue, send polite reminder; at 30 days, escalate; at 60 days, mark for collections review”
- Scheduling — “when weather alert hits a threshold, offer affected customers reschedule slots”
- Feedback — “when job completes, send satisfaction survey 24h later; if rating ≤ 3 stars, alert owner immediately”
Click any template to load it onto the canvas. Each template’s nodes appear pre-configured with sane defaults; you tweak details in the Properties panel rather than building from scratch.
Step 4: Configure a node
Click any node on the canvas. The right-side Properties panel populates with that node’s configuration:
- Trigger node — the event type, any filters (only fire for emergency-priority jobs, only for customers with X tag, etc.)
- Condition node — the branching expression and its Yes/No branches
- Action node — the message template, recipient, channel (SMS / email / both), retry behavior
- Integration node — credentials reference, API endpoint, payload mapping
Each node card on the canvas shows its current state: Configured (green check) or Setup Required (yellow warning). The footer of the canvas tells you X / Y configured and gates the Activate button until all nodes are configured.
Tip: Use Test Run in the canvas toolbar before clicking Activate. Test Run fires the workflow with sample data so you see what each node does without affecting real customers. The Logger node is your friend here — drop one before any external action to see what data flows through.
Step 5: Activate and monitor
Once every node is configured and Test Run looks right, click Activate in the top-right. The workflow moves from Draft to Active state — it now fires whenever its trigger event happens.
Track active workflows from the page header counters:
- Active — currently enabled workflows
- Running Workflows — instances mid-flight (a workflow that includes a Delay node will sit in Running for the duration of the delay)
- Total Nodes — sum of all configured nodes across all workflows
Inside any workflow, the canvas updates in real-time as instances fire — each node briefly highlights when traversed, helping you spot stuck or failing branches.
Warning: Workflows that include AI actions (Send to AI, AI Compose) consume your tier’s monthly minute/message pool. A workflow that auto-replies to every inbound text might burn through pool faster than expected. Use the Audit Log under Settings → System to track AI consumption per workflow.
Step 6: Common patterns worth building on day one
Three workflows that pay for themselves within the first month:
Pattern 1 — Overdue invoice reminder
Trigger: Invoice unpaid 7 days → Action: Send SMS reminder → Delay: 7 days → Condition: Still unpaid? → Action: Send escalation
Pattern 2 — Post-job follow-up
Trigger: Job marked complete → Delay: 24 hours → Action: Send satisfaction text → Condition: rating ≤ 3? → Action: Alert owner; otherwise: do nothing
Pattern 3 — Emergency auto-assign
Trigger: Emergency Request → Condition: Within business hours? → Action: Auto-assign nearest tech + Send customer ETA; otherwise Action: Escalate to on-call phone
Each of these maps directly to a built-in Template, so you can start by cloning the template and modifying the message text and timing to your business.
Step 7: Disable, edit, and version
Each saved workflow has three states: Draft (in-progress, not firing), Active (firing on triggers), and Archived (kept for reference, not firing).
- To pause without deleting: change Active → Draft
- To edit a live workflow: clone it (top-right ⋯ menu), modify the clone, Activate the new version, then Archive the old — this preserves audit history
- To compare versions: open the Audit Log filtered by Source: Workflow, find the workflow ID, see every state change with timestamp and editor
Warning: Editing a live workflow in place is allowed but risky — changes apply to the next trigger event. For non-trivial changes, prefer the clone-and-swap pattern above to avoid mid-flight surprises.
Real-World Example
You discover (via the Owner Dashboard) that overdue invoices have crept up to 18% of receivables. You open Workflow Builder, click the Billing template, and modify it: change the SMS text to your house tone, add a Logger node before each escalation so you can track which customers got which message, set the escalation cadence to 7 / 14 / 30 days. Test Run looks good. You click Activate. Three weeks later: overdue receivables drop from 18% to 7%, no customer complaints (the polite tone worked), and the few that escalate to 30 days get a phone call with full context. One workflow, ~$8k of recovered cash flow per quarter.
What’s Next?
- Configuring the AI Assistant — workflows that include AI actions inherit this configuration
- AI Settings Hub — meta-overview of all AI surfaces
- Reports and Analytics — measure workflow impact on your KPIs
- Configuring Notifications — control which workflow events page you
Need help? Post in the Tech Support category or contact support@exoserva.com.