The AI Assistant is the brain behind Exoserva’s automated dispatch, AI Compose replies, and behavioral nudges. This guide walks you through the three configuration surfaces — AI Settings (the voice and language), AI Automation (rule-based behaviors), and AI Dispatch (how technicians get assigned) — and shows you what to tune first, what to leave alone, and what every dial actually does.
Estimated time: 10 minutes
Before You Begin
- Owner or Tenant Administrator role (the only roles that can edit AI configuration)
- A few weeks of operational data ideally — fresh accounts can configure but won’t see meaningful AI Dispatch suggestions until there’s history to learn from
- (Optional) A short brand-voice cheat sheet — “we say ‘tech’ not ‘technician’, we don’t say ‘guys’ or ‘ladies’” — speeds up Step 2
Step 1: Find the AI configuration surfaces
Open Settings (gear icon top-right or ⌘K). In the left sidebar under System you’ll see four AI-tagged entries:
- AI Settings — the voice, prompts, and personality the AI presents
- AI Automation — rules that fire on events (job created, payment overdue, weather alert)
- AI Dispatch — the scoring weights that decide which technician gets the next job
- Audit Log — every AI action with timestamp (covered separately in security guides)
Each is a separate page. Configure them in this order — voice first (it shapes every output), automation second (it sets when the AI acts), dispatch last (depends on a populated team and customer base).
Step 2: Tune the AI’s voice in AI Settings
Click AI Settings under System. The page splits into editable prompt categories and a Protected System Rules section.
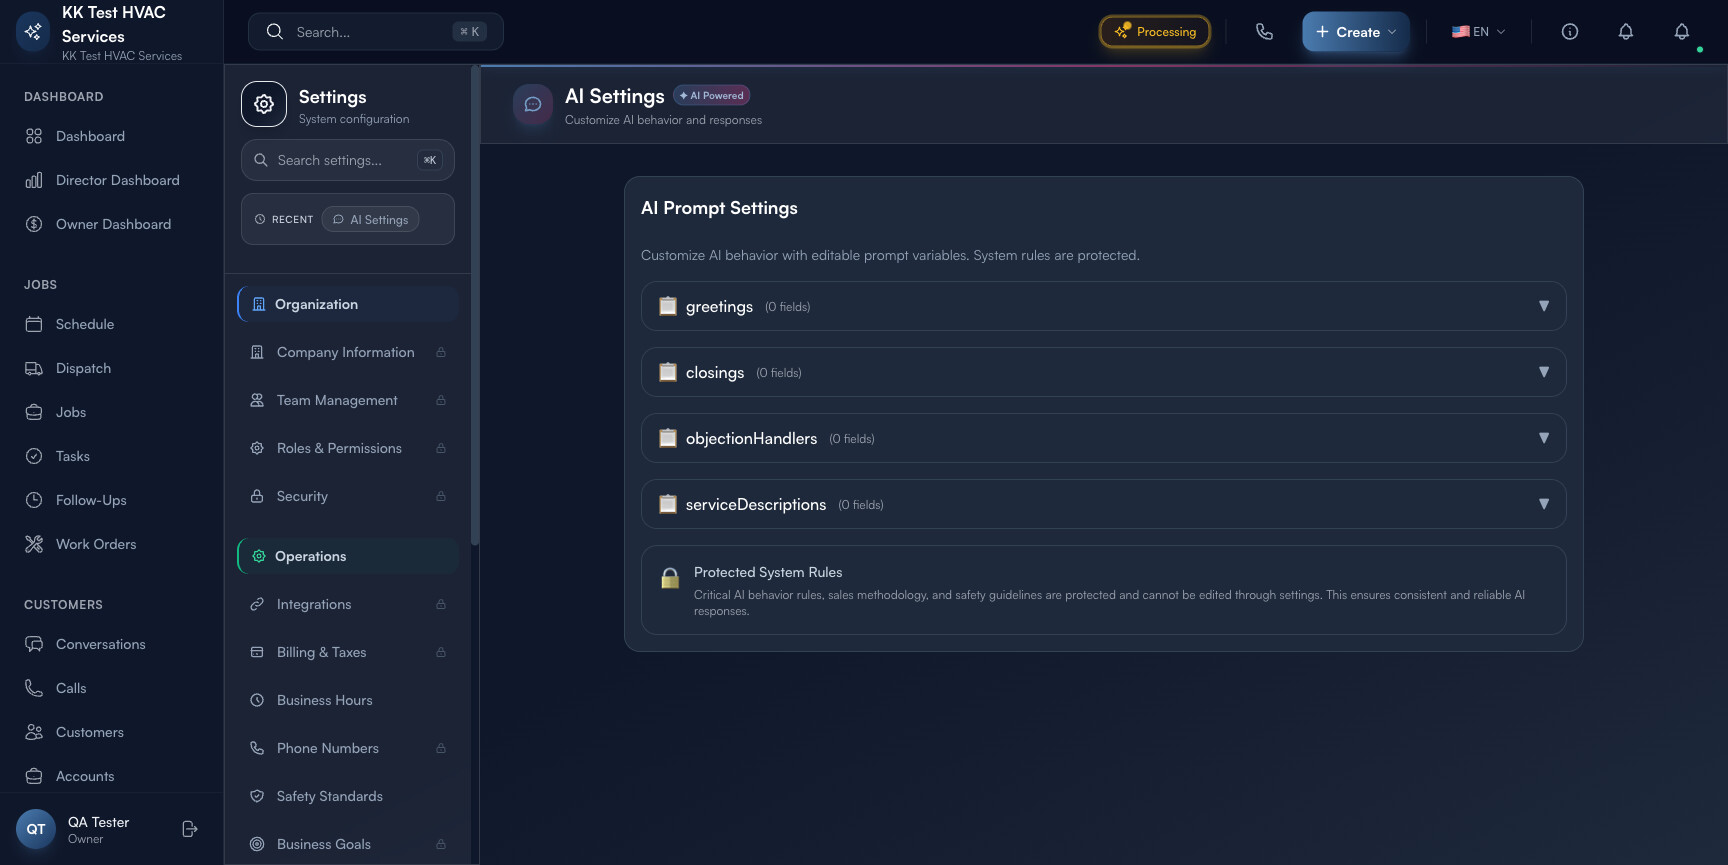
Four editable categories at the top, each expandable:
- greetings — the opening phrase when the AI receptionist picks up the phone or starts a chat (“Hi, this is Riley with Acme HVAC, how can I help?”)
- closings — how the AI signs off (“You’re all set — we’ll see you at 2 PM Tuesday. Anything else?”)
- objectionHandlers — pre-canned responses to common pushback (“too expensive”, “I need to think about it”, “I’ll call back”)
- serviceDescriptions — your house style for naming services (“capacitor replacement” vs “electrical part swap” — pick one and stick to it)
Click any category to expand and add fields. Keep entries short and conversational — the AI will adapt them to the live context, so your job is to set tone, not script word-for-word.
Tip: Don’t write more than 3-5 entries per category at first. The AI mixes phrases, so 5 well-tuned greetings produce ~20 unique-sounding openings. Adding 50 generic ones makes the output feel scripted and chatbot-y.
The ![]() Protected System Rules notice at the bottom tells you the truth: critical sales-methodology, safety, and refusal rules are baked in and can’t be edited through this page. That’s deliberate — they’re the seatbelt that keeps the AI from offering refunds it shouldn’t, or recommending unsafe DIY fixes.
Protected System Rules notice at the bottom tells you the truth: critical sales-methodology, safety, and refusal rules are baked in and can’t be edited through this page. That’s deliberate — they’re the seatbelt that keeps the AI from offering refunds it shouldn’t, or recommending unsafe DIY fixes.
Step 3: Wire up event-driven AI in AI Automation
Click AI Automation under System. This page lists every rule-based AI behavior, organized by trigger category (Jobs / Invoices / Customers / etc.).
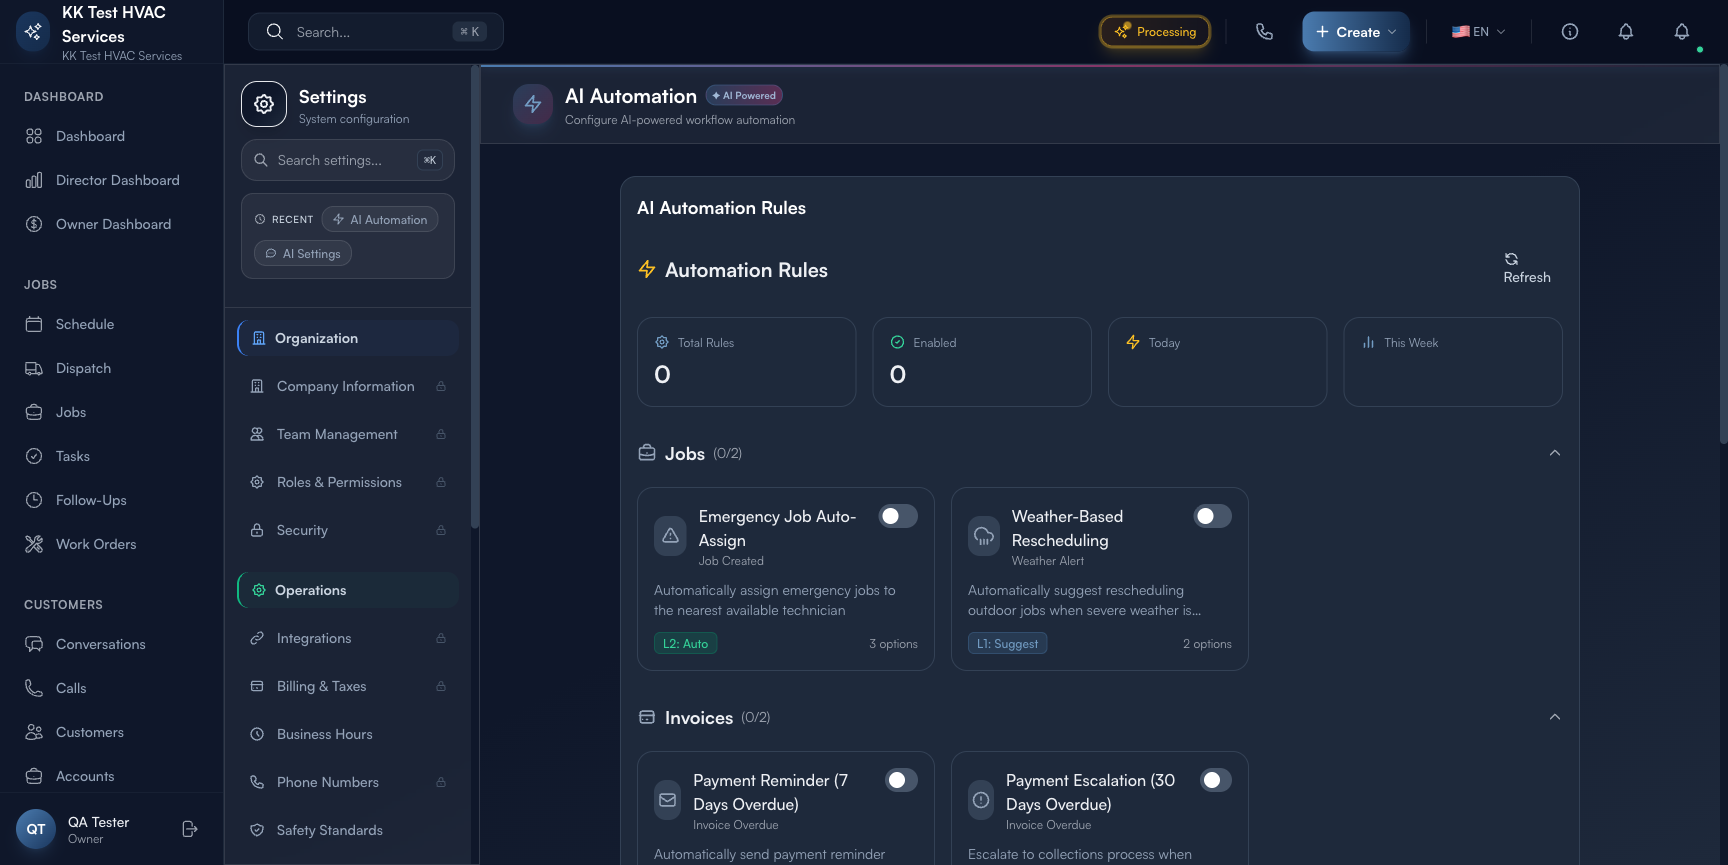
The header shows Total / Active / Today / This Week counters — the Total is rules configured, Active is rules currently firing, Today / This Week count actual executions. Use these to spot stalled rules (Active count high but Today count zero usually means the trigger hasn’t fired or there’s a config issue).
Below the dashboard, rules are grouped by area. Each card has:
- Rule name + brand emoji
- One-line description of what it does
- Active toggle — flip on/off in one click without deleting
- Action button (Edit / Suggest / etc.) for deeper configuration
Common rules worth turning on early:
- Emergency Job Auto-Assign — when an inbound call is classified emergency, the AI assigns the closest available tech without waiting for a dispatcher
- Weather-Based Rescheduling — if a forecast hits a configured threshold (e.g., snowstorm), the AI proactively offers reschedule slots to affected customers
- Payment Reminder (7 days overdue) — first-touch reminder via the customer’s preferred channel
- Payment Escalation (30 days overdue) — second-touch with a stronger ask, optional SMS-only
Warning: Don’t turn on every rule on day one. Each rule sends customer-facing messages in your name. Flip on one, watch it for a week, then add the next. Going from 0 to 12 active rules overnight is how you generate complaint emails.
Step 4: Configure scoring weights in AI Dispatch
Click AI Dispatch under System. This page is where you tell the AI how to choose a technician when a new job comes in.

The interface is a stack of sliders that must sum to 100%:

Each slider corresponds to a factor:
- Skill Match (default 30%) — does the tech have the certification this job requires? (HVAC EPA, gas-line endorsement, etc.)
- Proximity (default 25%) — distance from the tech’s current location to the job address
- Availability (default 20%) — schedule conflicts and time-window match
- Workload Balance (default 15%) — keeps no single tech buried while others sit idle
- Performance (default 10%) — historical metrics — completion rate, customer rating, on-time arrival
Drag any slider to weight what your business values. A new tech-heavy operation might bias toward Skill Match (60%); a saturated urban service area might bias Proximity (40%). The AI re-runs scoring on every dispatch decision, so changes apply immediately.
Tip: Review your scoring weights quarterly. As your team matures (skills converge) and your service area shifts (you expand into new zip codes), the right weights drift. The default 30/25/20/15/10 is a starting point, not a finishing line.
Step 5: Verify with the Audit Log
Open Audit Log under System. Filter by Source: AI to see every AI-driven action — assignments, messages sent, reschedules proposed. This is your single source of truth for what the AI actually did yesterday.
Make a habit of skimming the AI audit log every morning for the first month after a config change. Look for:
- Misassignments — jobs that went to the wrong tech (suggests a Skill Match weight that’s too low)
- Customer complaints in Conversations about an AI message that was off-tone (suggests a greeting or closing prompt that needs editing)
- Repeated rescheduling on the same job (a rule firing too aggressively)
Each issue points to one of the three pages above — fix it at the source.
Step 6: Coordinate with Voice AI and AI Compose
The AI Assistant configured here is the brain — it’s the same persona that powers:
- Setting Up Voice AI — when the phone rings, this is who answers
- Conversations and Customer Chat — the AI Compose draft button uses these prompts
- Dispatcher Daily Workflow — Auto-Assign uses your scoring weights
Make sure changes you make on this page are reflected in those flows. Test by calling your own AI phone number after a prompt edit and listening to the greeting — that’s the fastest verification.
Warning: AI behavior consumes minutes/messages from your tier’s monthly pool (see the financial model linked in your billing docs). Aggressive automation rules can run the pool down faster than expected — keep an eye on overage in the Billing & Taxes section after any major change.
Real-World Example
You just hired a fourth tech named Riley, fresh out of a residential HVAC apprenticeship. Riley has the basics but no commercial certifications and isn’t ready for the high-rise calls your senior tech handles. You open AI Dispatch and bump Skill Match from 30% to 45% (paid for by reducing Workload Balance from 15% to 0% — Workload Balance only matters once everyone is roughly competent at everything). The result: AI dispatch routes commercial calls to your senior tech and residential calls to Riley until Riley earns the EPA-608 in three months. Then you walk Skill Match back to 30% and Workload Balance back to 15%. Three slider drags, one configuration change, no escalating customer complaints.
What’s Next?
- Setting Up Voice AI — turn on the 24/7 phone receptionist
- AI Settings Hub — meta-overview of all AI controls
- Workflow Builder – Automate Your Operations — build custom rules beyond the defaults
- Voice Analytics — Understanding Your Calls — measure how the AI is actually performing
Need help? Post in the Tech Support category or contact support@exoserva.com.