Customizing your branding is the difference between an invoice that looks like “a contractor” and one that looks like your contractor. This guide walks through the Company Information page where the foundation of your customer-facing identity lives — business name, tax ID, contact info, service area, regional settings — and how each field flows into invoices, estimates, AI messages, and the customer portal.
Estimated time: 7 minutes
Before You Begin
- Owner or Tenant Administrator role (Roles, Permissions, and Security)
- Your EIN / Tax ID (required for SMS A2P 10DLC registration)
- Your business address and service area (zip codes or cities)
- (Optional) Logo file — PNG or SVG, transparent background, ideally 512×512 or larger
Step 1: Open Company Information
Press ⌘K to open Settings, then click Company Information under Organization. Direct URL: /settings/company. The page is split into top-to-bottom sections: phone status banner, Basic Information, Contact Information, Business Address, Service Areas, Regional Settings.
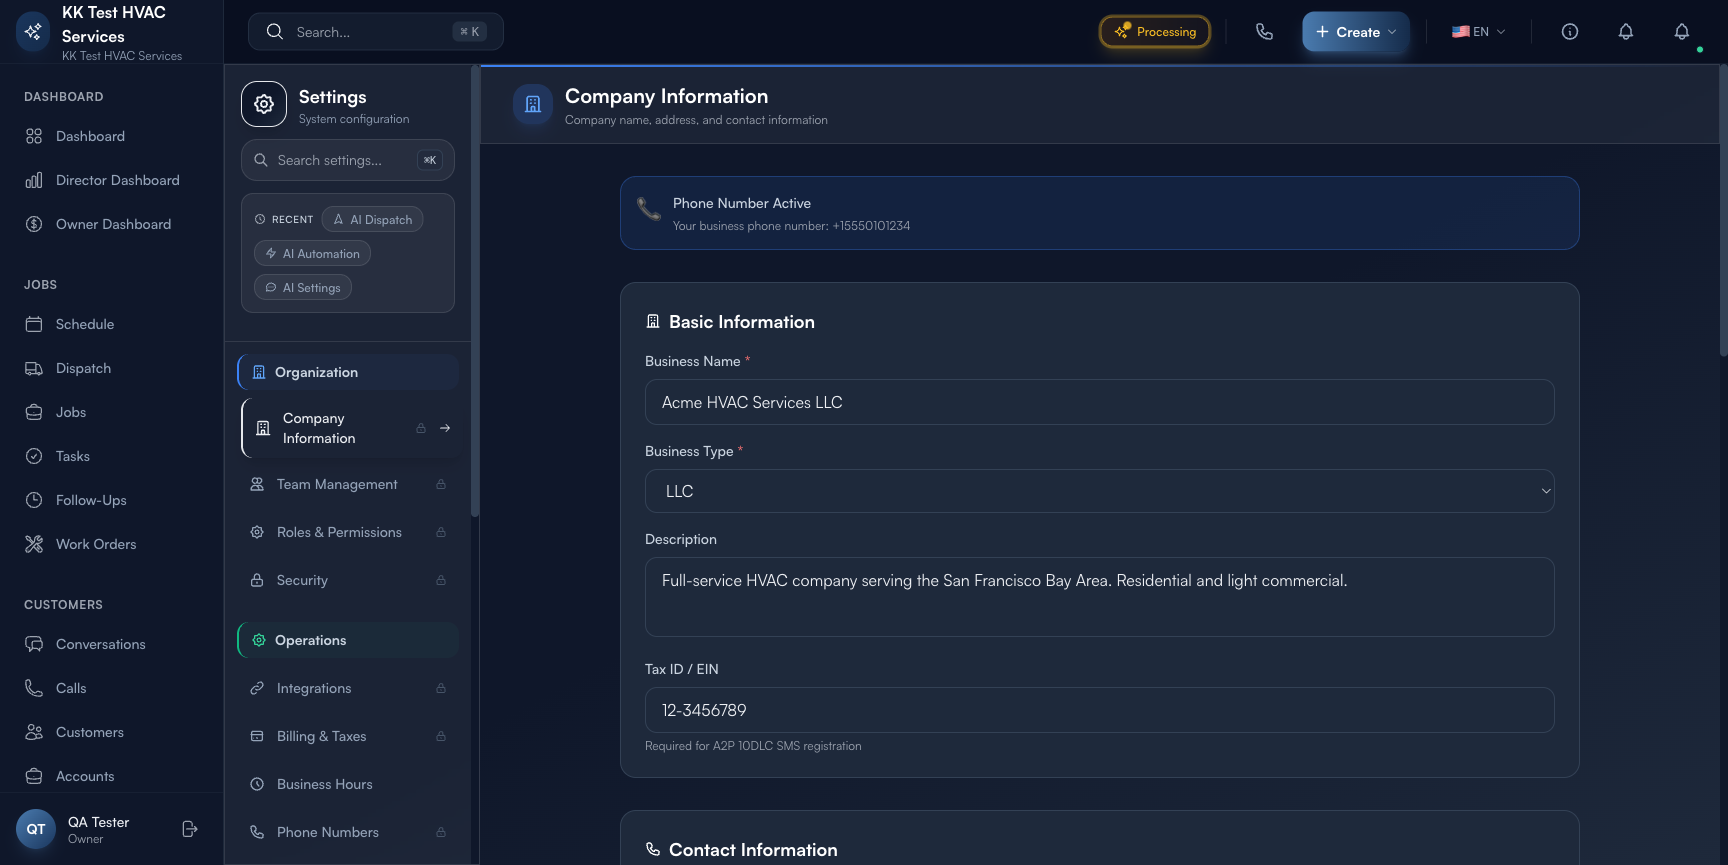
The blue Phone Number Active banner at the top tells you which business number is currently routed to your AI receptionist (or to your team if Voice AI is off).
Step 2: Fill in Basic Information
The Basic Information section is the brand identity that flows into every customer-facing surface — invoices, estimates, AI greetings, the booking page:
- Business Name (required) — exactly as you want it on legal documents and customer messages. The AI greeting reads this as “Hi, this is {assistant} with {Business Name}, how can I help?”
- Business Type (required) — Sole Proprietorship / Partnership / LLC / Corporation / Non-Profit. Drives the tax form output and a few legal disclaimers.
- Description — one paragraph summary that appears on your customer-facing booking page and the AI’s “what does this business do?” responses. Keep it under 60 words.
- Tax ID / EIN (required for SMS) — used for A2P 10DLC SMS registration; without this, outbound text messages will be throttled or blocked by US carriers in 2026.
Tip: Treat the Description field like a 30-second elevator pitch. “Full-service HVAC contractor serving the San Francisco Bay Area. Licensed, bonded, and insured.” is great. “Services for HVAC needs!” is what the AI will repeat back to customers — boring goes badly here.
Step 3: Set Contact Information
The Contact Information section is what’s visible to customers on every invoice, estimate, and email signature:
- Phone Number (with country flag dropdown) — your main customer-facing line; this is the number that shows on caller ID for outbound business calls
- Email Address — primary inbox for customer replies that don’t route to a specific channel
- Website — used as a clickable link in customer messages and invoice PDFs
Tip: If you’ve ported your business number into the Voice AI system, the Phone Number here should be the customer-facing number, not an internal line. Anything you put here ends up in the customer’s inbox.
Step 4: Configure Business Address
The Business Address section covers the legal address of your company:
- Street Address (required)
- City / State / ZIP / Country (all required)
This address shows on invoices, on the customer-facing booking page, and on legal disclosures. For solo operators working from home, it’s typical to use a virtual mailbox or PO box here — most field-service contractors don’t broadcast their home address, and there’s no legal requirement to.
Warning: If you change the Business Address after invoices have been issued, the historical invoices keep the old address. Customers calling about an old invoice and showing up to a moved-but-not-updated address is a real (and frustrating) failure mode. Update the address, then issue a Customer Update email to your client list.
Step 5: Add Service Areas
The Service Areas section is critical for AI dispatch and customer-facing booking — Exoserva uses it to:
- Tell the AI receptionist which zip codes to confirm bookings for (and which to politely decline as out-of-area)
- Show coverage on your customer-facing booking page
- Suggest territories on the Managing Service Territories page
Click Add and enter a city, region, or zip code. Add multiple — most field-service businesses cover 5-15 zip codes. The list grows; remove obsolete entries when you trim coverage.
Step 6: Set Regional Settings
The Regional Settings section governs:
- Timezone — every job time, schedule entry, and notification timestamp uses this. Wrong timezone = customer thinks 9 AM means 9 AM their time when actually it means 9 AM your time.
- Date format — MDY / DMY / YMD
- Currency — USD / CAD / EUR / etc.
- Number format — decimal vs. thousand separators
For US contractors: Eastern / Central / Mountain / Pacific Time + MDY + USD covers ~99% of cases.
Step 7: Save and verify
Click Save at the top-right (or Ctrl/⌘+S). Then verify your changes flowed correctly:
- Open a draft invoice in Invoices (guide) — your business name and address should appear in the header
- Open the AI Settings (guide) → click Test Call — the AI greeting should mention your business name verbatim
- Open the customer-facing booking page (URL is in the Booking settings) — service areas, description, and phone should all reflect the latest edits
Tip: Make a test booking from your own phone after any branding change. The end-to-end customer experience is where you’ll catch a typo or a missing address before a real customer does.
Step 8: Logo and theme (covered in adjacent guides)
This page handles information branding (the words customers see). For visual branding:
- Logo upload lives in the same Settings → Display Preferences (guide)
- Color scheme for invoices and customer portals — also in Display Preferences
- Custom domain for the customer-facing booking page — under Settings → Integrations (if your tier supports it)
Real-World Example
You started under your name as a sole proprietor and just incorporated as Bay Plumbing Services LLC. You open Company Information, change Business Name and Business Type, update the Tax ID to the new EIN, leave the phone unchanged. You save. You then open a recent customer’s draft estimate to verify — it now reads “Bay Plumbing Services LLC” in the header, with the new EIN on the tax line. You email a customer-update note out of Conversations. Total time: 8 minutes for a legal-entity rebrand that would take an attorney 2 hours to walk through.
What’s Next?
- Display Preferences & Theme — logo, colors, layout
- Configuring Notifications — control who hears about what
- Setting Up Voice AI — the AI uses your business name in every greeting
- Configuring the AI Assistant — fine-tune brand voice in AI prompts
Need help? Post in the Tech Support category or contact support@exoserva.com.