Display Preferences are the small visual settings that compound into “this app feels comfortable” or “this app feels exhausting” over a 60-hour week. This guide walks through every toggle on the Display Preferences page — Theme, Compact mode, Animations, Sidebar — and which choice typically works best for which kind of user.
Estimated time: 4 minutes
Before You Begin
- Any user role with login access (settings are per-user, not tenant-wide)
- (Optional) Knowledge of your work environment — bright office vs. dim van vs. mostly mobile changes the right answer
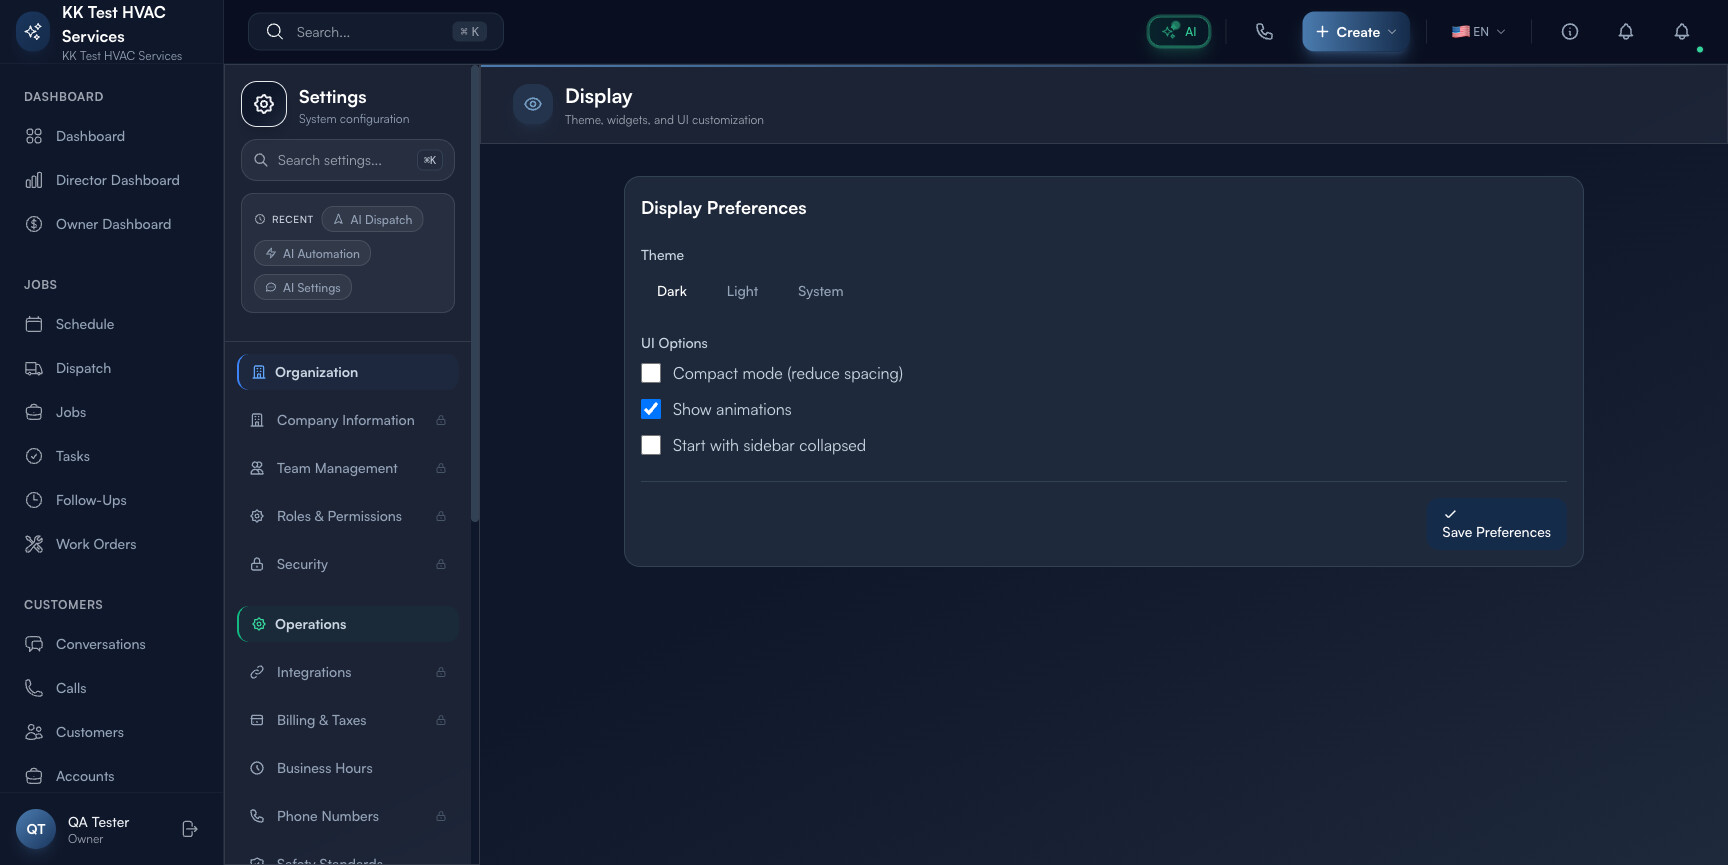
Step 1: Open Display Preferences
Press ⌘K to open Settings, then click Display under Personal. Direct URL: /settings/display. The page is short — every option fits in one viewport.
Tip: Display settings are per-user and synced across your devices. Change once on desktop, see the same choice on mobile next time you open the app.
Step 2: Pick a Theme
The Theme section has three options:
- Dark — white text on dark background; easier on eyes in dim/evening environments and reduces glare
- Light — black text on white background; better readability in bright outdoor or fluorescent-lit environments
- System — follows your OS preference (auto-switches at sunset/sunrise on macOS Big Sur+ and Windows 11+)
Most contractors who work outdoors during the day pick Light (sun glare on dark themes is unreadable). Dispatchers in offices typically pick Dark to reduce eye strain over a 9-hour shift. System is the right default if you bounce between environments.
Tip: If you’re unsure, set to System for a week. Watch which mode you find yourself sitting in for longer — that’s your true preference. Then lock to it.
Step 3: Configure UI Options
Three toggles control the layout density and motion:
- Compact mode (reduce spacing) — tightens row heights, shrinks padding, fits more rows per viewport. Great for power users on big monitors who want to see 50 jobs at once.
- Show animations — soft transitions on hover, expanding panels, smooth scroll. Off saves 2-5% CPU on older laptops/tablets and reduces motion-sickness for some users.
- Start with sidebar collapsed — when on, the left sidebar (Dashboard / Jobs / Customers nav) starts hidden each session. Reduces visual clutter on small screens.
Tip: Compact mode + animations off is the speed-runner setup — denser data, faster perceived response. Standard spacing + animations on is the polished setup — easier to learn for new users, looks better in screenshares with customers.
Step 4: Save Preferences
Click Save Preferences at the top-right (or Ctrl/⌘+S). Theme changes apply immediately; spacing/animation changes take effect on next page navigation.
Warning: Sidebar-collapsed setting is saved per-device, not synced. If you set it on desktop but want different behavior on a tablet, set it separately on each device.
Step 5: Test in your real workflow
Don’t judge the new settings on the Display page itself. Navigate to a busy page (Schedule board, Jobs list, Conversations) and use them for 10 minutes. Then come back and adjust. The right combination is the one you stop noticing — both extremes (uncomfortable spacing, distracting animations) draw attention away from your actual work.
Step 6: Reset if needed
There’s no explicit reset button — to revert to defaults: Theme = System, all UI Options = on (default state). Save and you’re back to baseline.
Real-World Example
You’re a dispatcher running an 8-hour shift on a 14-inch laptop. You start with all defaults (System theme, standard spacing, animations on). By 4 PM you have a slight headache from screen brightness, eye fatigue from constant motion, and frustration that the schedule board only shows 6 jobs at a time. You open Display Preferences: switch to Dark, turn on Compact mode, turn off animations. The schedule board now shows 12 jobs at a glance, the screen is dimmer (no headache), and there’s no peripheral motion pulling your attention. Next day’s shift is measurably less tiring — settings change, no other variable.
What’s Next?
- Configuring Notifications — control what interrupts you
- Customizing Your Branding — branding for customer-facing surfaces
- Roles, Permissions, and Security — Display setting is per-user; permissions are per-role
Need help? Post in the Tech Support category or contact support@exoserva.com.