Every customer call ends with a job — a scheduled visit with a problem to fix and a tech to send. The Jobs page is the operational heart of your business: it’s where dispatch happens, where work-in-progress lives, and where money in process turns into money collected. New users often treat it as a passive list, but the right daily habits on this one page (read overdue, check unassigned, watch lifecycle states) keep the whole shop moving.
Estimated time: 9 minutes
Before You Begin
- Owner, Manager, or Dispatcher role with Manage Jobs permission (Roles, Permissions, and Security)
- At least one Customer in your workspace (Managing Customers)
- A Price Book populated so line items pull in fast (Setting Up Your Price Book)
- (Optional) At least one technician on your team — you can also leave jobs unassigned and dispatch later
What is a “Job” — and how does it relate to Estimates and Invoices?
For new users:
A Job is a scheduled unit of work — one visit, one customer, one outcome. It’s the operational object that techs work on, not the financial object the customer pays for.
Object chain across the lifecycle:
| Object | Stage | Document type |
|---|---|---|
| Estimate | Before work | “Here’s the cost” |
| Job | The work itself | Scheduled visit + execution |
| Invoice | After work | “Here’s what you owe” |
| Payment | Settled | “Got it, thanks” |
A Job can come from an approved Estimate (auto-conversion), a customer phone call (created by hand), or a recurring schedule (preventive maintenance). Either way, the Jobs page lists every one.
Step 1: Open the Jobs page
Click Jobs in the left sidebar. Direct URL: /jobs. The page lists every job in the workspace, filterable by status, assignee, date, and free-text search.
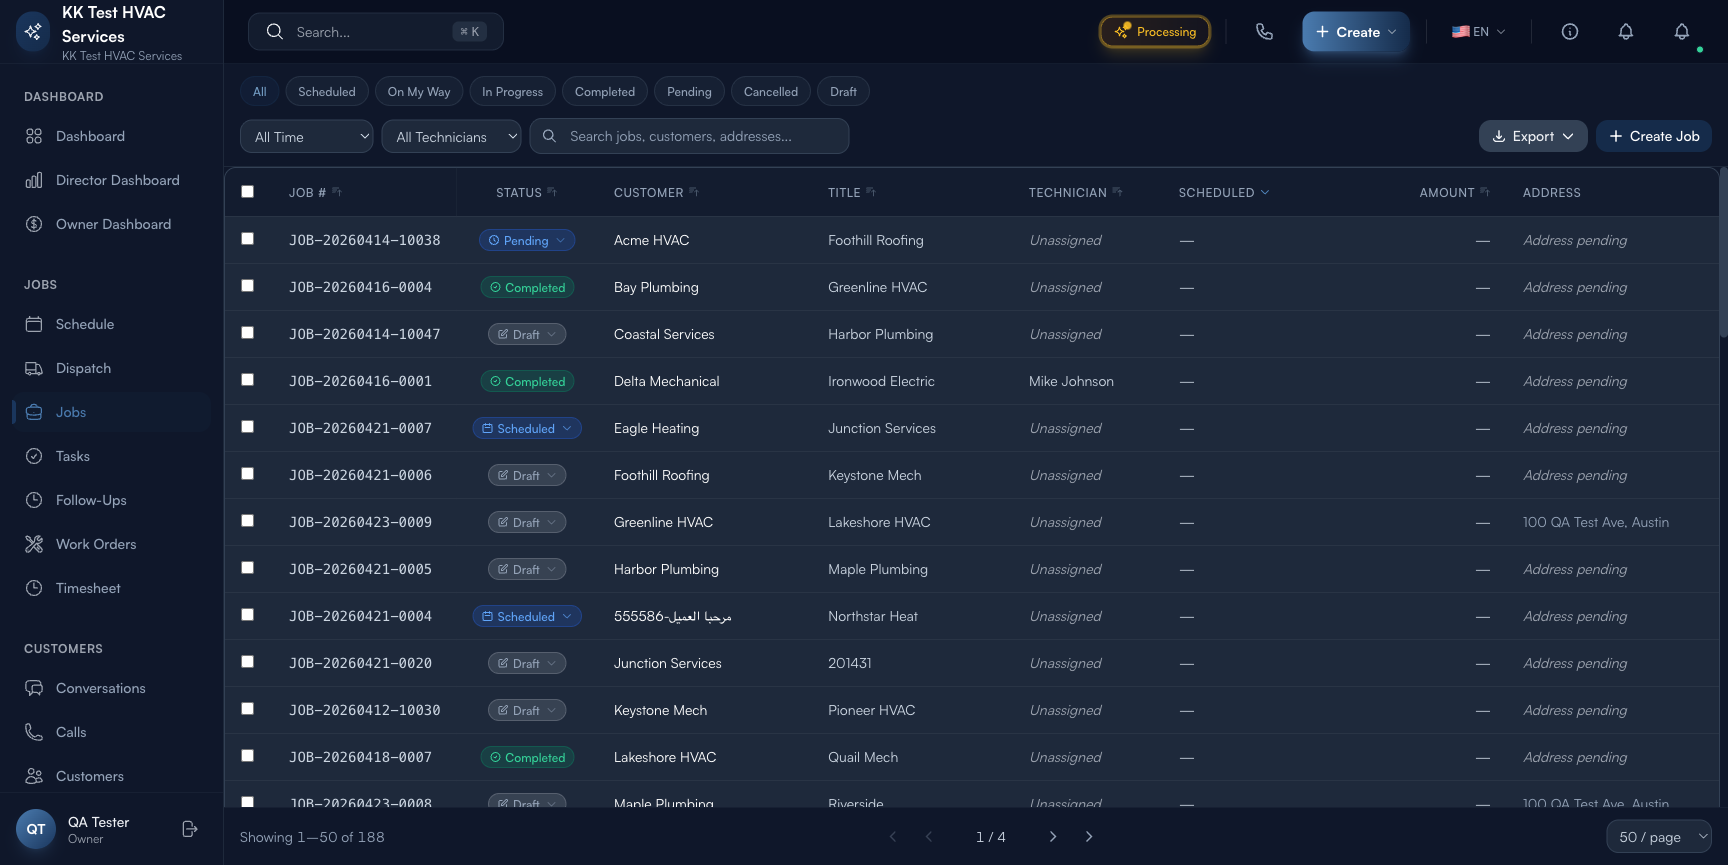
Step 2: Read the page header
The strip at the top gives you a fast operational read:
![]()
- Total Jobs — every job in the workspace
- In Progress / Scheduled / Completed — quick counts by status
- Filters — date range, technician, customer, search
- Action toolbar — Export, Bulk Actions, + Create Job
Tip: Watch In Progress count over the day. If it stays flat from morning to afternoon, your techs aren’t closing work as they go — usually means they’re forgetting to mark jobs Completed on their phone before driving to the next one. Train this habit; it pays back in faster invoicing.
Step 3: Read the status tabs
Above the table, status filters break jobs by lifecycle state:
![]()
- Scheduled — date and time set, technician (often) assigned, work hasn’t started
- In Progress — tech has started the work (clocked in or marked Start)
- Completed — work done, ready to invoice
- On Hold — paused (waiting parts, customer reschedule, weather)
- Cancelled — won’t happen
The Unassigned filter (separate toggle) shows jobs scheduled but with no tech yet — your dispatcher’s hot list.
Tip: Start every morning on Unassigned + today’s date. These are jobs that customers expect today but no one is sent yet — biggest fire-risk on your board.
Step 4: Read the table columns
Each job row carries:
![]()
- Job # — auto-generated (e.g. JOB-2046)
- Title — short description (auto-pulled from first line item if blank)
- Status — color-coded pill
- Customer — name (clickable to customer profile)
- Technician — assignee or “Unassigned”
- Scheduled date / time window
- Total — line-item sum (estimate-side amount)
- Actions — three-dot menu: Edit, Mark In Progress, Mark Completed, Reschedule, Cancel
Click any row → opens the Job detail with the lifecycle bar, line items, schedule, address, notes, photos, and history.
Step 5: Create a new job
Click + Create Job in the top-right. The job wizard has five steps along the top: Customer → Line Items → Schedule → Address → Notes.
- Customer: search-pick existing or Add Customer inline
- Line Items: pull from your Price Book — services and parts. Quantity and price editable per line.
- Schedule: date and time window. Skip to save as Draft and dispatch later.
- Address: pre-fills from customer’s primary; override for one-off properties
- Notes: gate codes, pet warnings, parking, what the previous tech did
Click Create Job to save. The job lands at the top of the list with status Scheduled (or Draft if you skipped scheduling).
Tip: Press ⌘N (macOS) or Ctrl+N (Windows) anywhere in the app to jump straight into the create-job wizard. The single biggest speedup for dispatchers handling 30+ calls/day.
Step 6: Drive a job through its lifecycle
Open any job from the list to see its lifecycle bar: Estimate → Approval → Scheduling → Work → Completed → Invoice → Payment.
The Actions row lets you advance:
- Mark Scheduled — sets date+tech if they were missing
- Mark In Progress — tech starts the work (also auto-fires when tech clocks in via mobile)
- Mark Completed — work done; surfaces in Ready to Invoice banner on the Invoices page
- Mark On Hold — pauses with a required reason field (visible in History)
- Cancel — closes the job; reason captured for analytics
Every transition is captured in the History panel at the bottom of the job detail with timestamp + actor.
Step 7: Reschedule and reassign
Two common dispatcher actions:
- Reschedule: open the job → drag in Schedule Board, or use the Reschedule action → pick new date/time → customer notified by SMS/email automatically
- Reassign: open the job → click the technician chip → pick another tech from the dropdown → both old and new tech notified
Warning: Don’t reassign or reschedule without telling the customer (or letting Exoserva auto-tell them). Customers who get a “your tech is on the way” text and don’t see them are the ones who write 1-star reviews.
Step 8: Bulk actions
Select multiple jobs (checkbox) → Bulk Actions menu. Useful operations:
- Bulk reassign — move 5 jobs from sick tech to backup tech in one click
- Bulk mark completed — for end-of-day cleanup of jobs already done
- Bulk reschedule — move a whole day’s jobs forward 1 day during weather event
- Export — CSV for analysis
Step 9: Common new-user questions
Q: What’s the difference between “Job” and “Work Order”?
A: In Exoserva: a Job is the customer-facing scheduled unit (one visit, one customer). A Work Order is the crew/internal execution document — what tools to bring, what parts, what safety procedures. One Job can have one Work Order. Most contractors only need Jobs unless they’re commercial/multi-crew.
Q: Can a customer see the Job in their portal?
A: They see a summary — date, time window, tech name and photo, and a “Track tech” link when the tech is en route. They don’t see internal notes (gate codes, etc.) — those stay tech-side.
Q: I marked a job Completed by mistake. Can I undo?
A: Yes — open the job → Reopen (visible only on Completed jobs). It flips back to In Progress. Caveat: if you’ve already created an invoice from it, you’ll need to void/cancel that invoice first.
Q: Two techs on one job — how?
A: Open the job → Add Crew Member in the technician section. Both techs see the job on their schedule and can clock in/out. Hours each spent are tracked separately.
Q: Can I copy a job?
A: Yes — open the job → ⋯ → Duplicate. Useful for recurring work (same customer, same scope, new date). Edits the date/time before saving.
Step 10: Common new-user mistakes
- Leaving jobs Unassigned past 9 AM — every unassigned job at 9 AM is a customer who’s wondering when you’re coming. Dispatch is a morning ritual, not an afternoon one.
- Skipping the Notes field — “gate code 4421, dog in backyard” takes 5 seconds to write and saves the next tech a 30-minute headache. Always note: access, hazards, prior visit context.
- Creating jobs without line items — empty jobs flow forward to invoice as $0. Even a placeholder line item (“diagnostic visit”) prevents accidental free work.
- Not marking On Hold when waiting parts — leaving a job In Progress for a week skews your in-progress counter and makes it look like the tech is slow. Mark On Hold; come back when parts arrive.
- Using a single status for everything — Completed means “work done”; not “billed”. Don’t bend the lifecycle to skip steps.
Real-World Example
You’re a plumber. Tuesday morning, 8:45 AM, your dispatcher opens Jobs filtered to Today + Unassigned: 4 jobs. She drags the closest two to the on-call tech (driving from the south side), the other two to your apprentice doing maintenance routes. Each tech opens their phone, sees the assigned jobs with addresses, gate codes, and parts lists. By 9:15 AM all 4 trucks are rolling. Your phone buzzes: an emergency call — water heater leak, 30 minutes away. Press ⌘N, search the customer (recognized from a maintenance visit last spring), pick “Water heater replacement” from the Price Book, schedule for 2 PM, drag to the on-call tech who’s wrapping up the morning batch. Auto-text fires to the customer: “Tech on the way at 2 PM”. Total elapsed time from call ringing to job scheduled and customer notified: 90 seconds.
What’s Next?
- Using the Schedule Board — drag-and-drop dispatch
- Managing Customers — customer profiles and history
- Follow-Ups and Task Management — keep nothing slipping through
- Creating and Sending Invoices — turn a completed job into paid revenue
Need help? Post in the Tech Support category or contact support@exoserva.com.