Inventory Management tracks every part you stock — from $2 sweat fittings to a $1,200 condenser unit — across the warehouse and your techs’ vans. New users typically don’t realize how much money sits in unmanaged parts inventory until they see the Total Value number light up. This guide walks the dashboard, the four sub-views, and the operational rhythm that keeps trucks stocked without parts hoarding.
Estimated time: 6 minutes
Before You Begin
- Owner or Manager role (Roles, Permissions, and Security)
- A short list of parts you actually carry (you don’t need to enter all of them on day one — start with your top 20)
What is “Inventory” — and how is it different from Price Book?
- Price Book (guide) = what you sell — services and parts, with sell prices
- Inventory = what you have — physical parts in stock, with quantities and reorder thresholds
Both reference the same parts catalog. Price Book asks “how much do I charge?”; Inventory asks “do I have any to charge for?”. Both required for healthy operations.
Step 1: Open Inventory Management
Click Inventory in the left sidebar. Direct URL: /inventory. The page header shows operational stats and four navigation tabs.
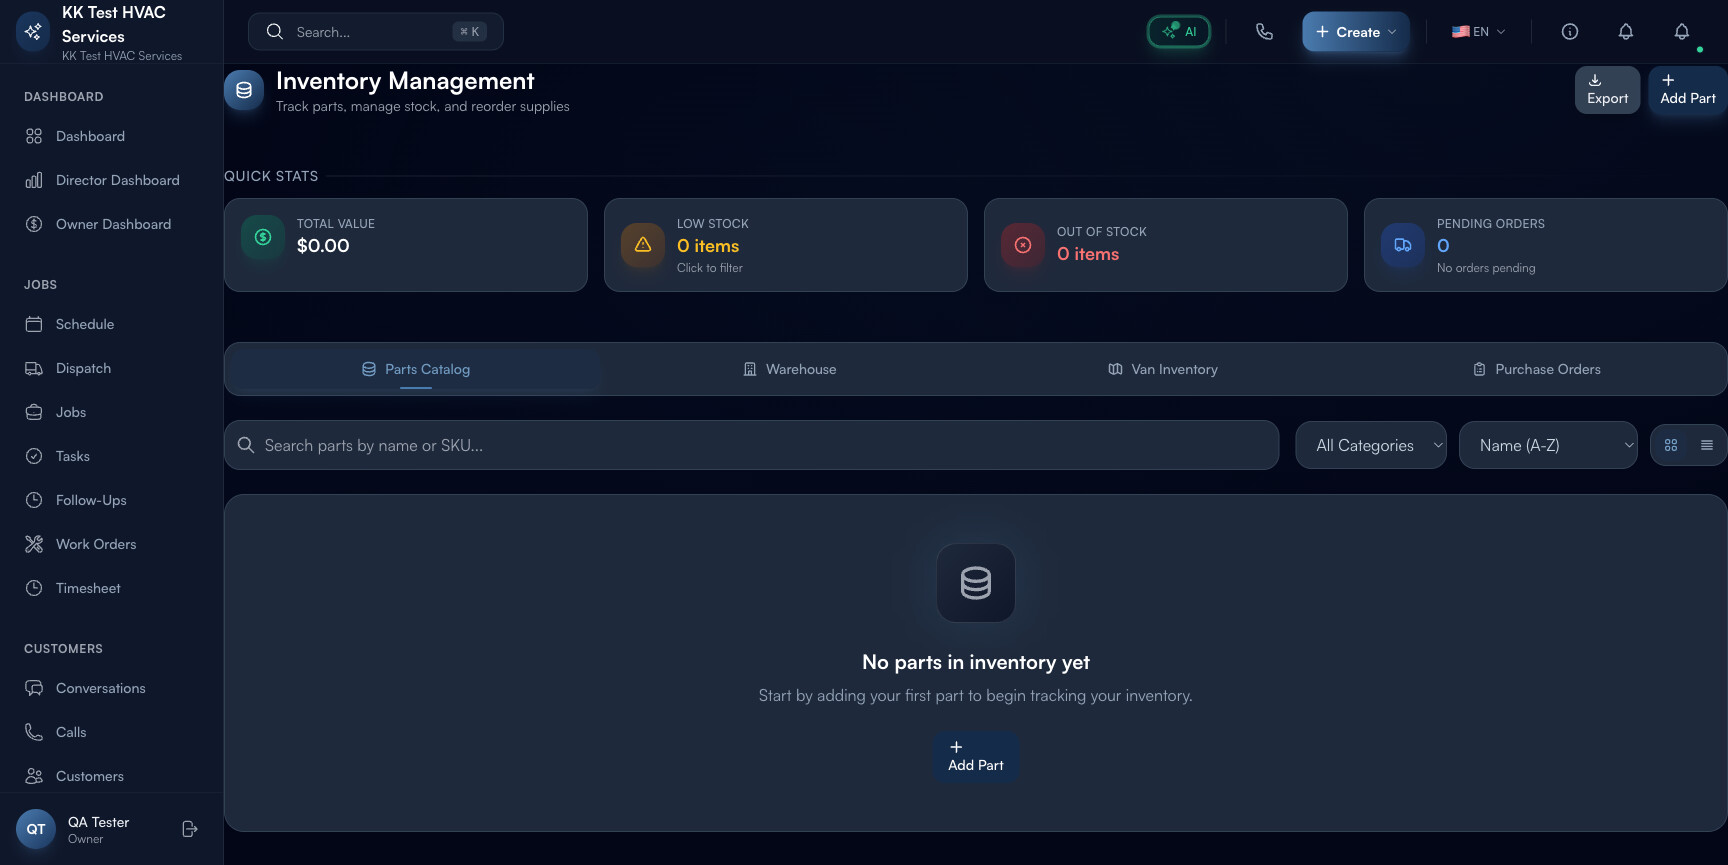
Step 2: Read the Quick Stats
The Quick Stats strip at the top is your daily pulse:
- Total Value — sum of all parts × cost; tells you how much capital is sitting on shelves and trucks
- Low Stock — parts below reorder threshold (red counter when > 0)
- Out of Stock — parts at zero quantity (urgent)
- Pending Orders — purchase orders awaiting delivery
Tip: Total Value is the most under-attended metric in field service. Most contractors carry 2-3x more inventory than they need. If yours is climbing without revenue climbing in proportion, you’re stockpiling — drag it down by tightening reorder thresholds.
Step 3: Switch between locations
Tabs across the middle:
![]()
- Parts Catalog — every SKU you stock, with default pricing
- Warehouse — quantities at the central location
- Van Inventory — what each tech is carrying right now
- Purchase Orders — outstanding reorders with supplier and ETA
Tip: Van Inventory is the single best lookup before dispatching a job. A tech with the right part on the truck closes the job in one visit; without it, you’re scheduling a return. Glance at this before sending a tech to a non-typical job.
Step 4: Filter and sort
Use the category dropdown (Plumbing / Electrical / HVAC / Appliance / General) to narrow. Sort by:
- Stock (Low to High) — find what’s about to run out
- Stock (High to Low) — find what you’re hoarding
- Recently Updated — spot today’s movement
- Name (A-Z / Z-A) — alphabetical lookup
Step 5: Add a part
Click + Add Part in the top-right. Required:
- Name, SKU, Category
- Default cost (what you paid)
- Default sell price (what you charge)
- Reorder threshold — quantity at which the part appears as Low Stock
- Reorder quantity — how many to order when triggering a reorder
Tip: Set the reorder threshold to one week of typical usage, not zero. By the time stock hits zero, your parts are already on backorder; threshold-triggered alerts keep you a week ahead.
Step 6: Bulk-import from CSV
If you already have an inventory list in spreadsheet form, click Import and upload. The template covers all required columns — paste your data, fix mismatches, re-import. Most contractors import 90-95% on first try.
Step 7: Use the Scan tool
Click the Scan button (or press ⌘B) to open a barcode scanner. Camera-scan the SKU sticker on a part — Exoserva jumps straight to that part’s detail page with current stock and recent movement history.
Step 8: Create a bulk reorder
When Low Stock counter is red, click Create Bulk Order. Exoserva pre-selects every part below threshold, with the supplier and quantity from each part’s defaults. Review, adjust, submit — a Purchase Order is generated and tracked.
Step 9: Common new-user questions
Q: How is this different from the Price Book?
A: Price Book = sell prices for the catalog. Inventory = quantities on hand. Same parts; two different operational concerns.
Q: Do I need to enter every part I’ve ever bought?
A: No — start with your top 20-30 parts (the ones generating most jobs). Add the long tail as you actually use them. Don’t try to enter 800 parts on day one.
Q: What if a tech uses a part not in inventory?
A: They can mark it as a Custom Material on the job. Doesn’t deduct from inventory but captures the cost for billing. After the job, add the part to inventory if it’s becoming common.
Q: How does Inventory connect to Jobs?
A: When a tech adds a Price Book part as a job line item, Inventory auto-deducts on job completion. Your Van Inventory and Warehouse counts go down; Low Stock alerts fire automatically.
Q: Can I track parts across multiple warehouses?
A: Yes — each tenant can configure multiple warehouses. Create a “Main Warehouse” and “Truck #2” and “Off-site Storage” if your operation needs it. Most one-shop contractors use Warehouse + Van Inventory only.
Step 10: Common new-user mistakes
- Setting reorder threshold to zero — by the time stock hits zero, you’re already in a stockout. Always set threshold to ~1 week of typical usage.
- Not auditing Van Inventory monthly — parts disappear from trucks (used without logging, returned to warehouse, “borrowed” by techs). Reconcile what’s claimed vs what’s there at least once a month.
- Importing all 800 parts on day one — overwhelming and most are dead weight. Start with top 20-30 and grow as needed.
Real-World Example
Friday afternoon you glance at Inventory: 4 parts low (capacitor, 1/2" copper coupling, R-410A, condenser fan motor). You click Create Bulk Order, the system bundles them into one PO with your two preferred suppliers, you confirm — Monday morning the parts arrive, the techs restock their vans, and the week starts at full capacity. Total time spent on inventory: 90 seconds.
What’s Next?
- Equipment and Asset Tracking — track installed equipment at customer sites
- Setting Up Your Price Book — set sell prices for the catalog
- Creating and Managing Jobs — parts pulled into job estimates
- Reports and Analytics — inventory turnover and waste reports
Need help? Post in the Tech Support category or contact support@exoserva.com.