Assets are equipment installed at a customer’s site — the AC unit on a roof, the boiler in a basement, the commercial refrigerator at a restaurant. New users typically don’t realize the long-term value of asset tracking until 18 months in: that’s when warranty expirations come due, equipment hits end-of-life, and the customer becomes a replacement-sales conversation. This guide walks the page, the warranty/health flags, and the upsell pipeline that quietly emerges from a populated asset list.
Estimated time: 5 minutes
Before You Begin
- Owner, Manager, or Dispatcher role (Roles, Permissions, and Security)
- Properties already in the system (Managing Properties) — every asset belongs to a property
What is an “Asset” — and how is it different from Inventory?
This trips up every new user:
- Asset = equipment owned by a customer that’s installed at their property. The customer’s AC unit, boiler, water heater. Long-lived (5-20 years).
- Inventory (guide) = parts owned by you that are in your warehouse or van. Replacement capacitors, copper fittings, refrigerant. Short-lived (consumed by jobs).
You service Assets using parts from Inventory. Both required for full operations.
Step 1: Open the Assets page
Click Assets in the left sidebar (under Customers). Direct URL: /assets. The page header shows operational status counts and filters.
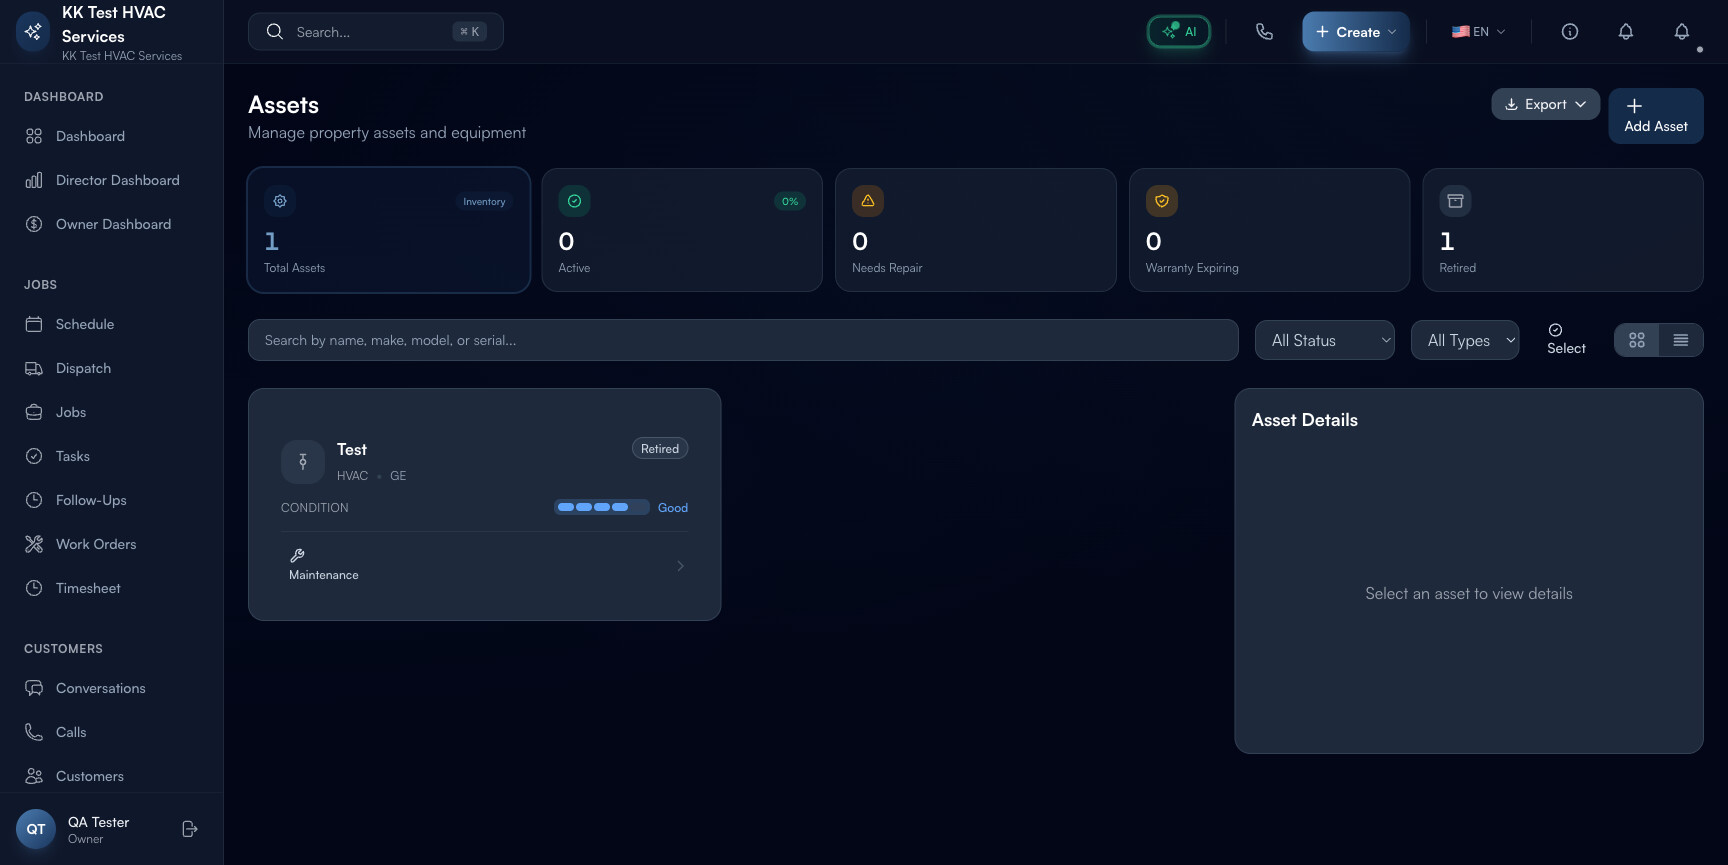
Step 2: Read the status counts
The header strip at the top:
![]()
- Inventory number — total assets tracked
- Total Assets — alias of the same count
- Active — currently in service
- Needs Repair — flagged for service work
- Warranty Expiring — due to expire in 90 days (your sales pipeline!)
- Retired — replaced or removed
Tip: Warranty Expiring is your highest-value pipeline. Each asset on this list is a customer who will soon need a service decision: extend the warranty, schedule preventive maintenance, or plan a replacement. Reach out 60 days before expiry — too late to react, too early to forget. 30-40% conversion rate to a paid maintenance plan or replacement quote.
Step 3: Filter by status and type
Filter row below the stats:
![]()
- All Status / Active / Needs Repair / Retired / In Storage tabs
- All Types dropdown — HVAC / Plumbing / Electrical / Refrigeration / Commercial / etc.
Use combinations: Needs Repair + HVAC shows just the AC units flagged for service — a focused list for your morning HVAC tech.
Step 4: Read an asset card
Each asset row shows:
- Selector + type icon
- Name (e.g. “TestHVAC” or “Lennox iComfort 2018”)
- Type pill (HVAC, Plumbing, etc.)
- Make + Model (small)
- Status badge (Active / Retired / Needs Repair)
- Condition rating (Excellent / Good / Fair / Poor)
- Maintenance history — recent service count
Click any asset to open the detail pane on the right with full timeline: every Job, repair photo, and warranty status.
Step 5: Add an asset
Click + Add Asset in the top-right. Required fields:
- Property — pick from the customer’s properties (asset must belong to a property)
- Type — HVAC / Plumbing / Electrical / Refrigeration / etc.
- Make / Model / Serial number — drives parts lookups and warranty
- Install date — anchors warranty math
- Warranty expiry
- Condition — Good / Fair / Poor (auto-updates as repairs are logged)
Tip: Photograph the dataplate and attach it to the asset record. When a tech is on-site needing a part number, the photo is faster than reading a dirty sticker behind a panel.
Step 6: Read the asset detail timeline
Click any asset to load the detail. You’ll see:
- Maintenance timeline — every Job and Work Order linked to this asset, oldest first
- Condition trend — visualizes degradation over time
- Warranty — manufacturer + your service warranty, expiry date
- Parts installed — when a part was replaced and from what PO
The history is the justification for replacement quotes. “This unit had 3 service calls in the last 18 months and the compressor’s making the noise it made before the last failure” is a stronger pitch when shown in a timeline than spoken from memory.
Step 7: Generate a replacement estimate
When an asset hits Poor condition or warranty expires, the Generate Estimate button on the detail pane drafts a replacement quote pre-filled with:
- The customer’s history at this property
- The asset’s age and recent failure rate
- A side-by-side repair vs replace comparison
Industry data: replacement quotes generated from asset detail close at ~30%+ vs ~10% for cold replacement quotes. The history is the difference.
Step 8: Common new-user questions
Q: Do I need to create asset records for every customer’s equipment?
A: No — start with assets that matter (commercial customers, multi-property contracts, equipment near end-of-life). Residential one-off jobs don’t necessarily need asset records. As your maintenance program grows, the asset list grows with it.
Q: How is this different from Inventory?
A: Asset = equipment at customer’s site (you service it). Inventory = parts in your warehouse (you install them). Different tables, different concerns.
Q: Where do I add equipment photos and PDFs?
A: Open the asset detail → scroll to Files section → drag-and-drop. PDFs (manuals, dataplates), images (install photos), CAD files (commercial layouts) all supported.
Q: An asset has 3 different repair-tickets in the timeline. How is “condition” calculated?
A: Auto-rating combines: install date, repair count in last 12/24 months, age vs typical-life-of-equipment-type, manufacturer recall flags. You can manually override the rating if you have on-site context the algorithm misses.
Q: How does this connect to Predictive Maintenance?
A: Predictive Maintenance reads asset data + repair history + (if available) live IoT telemetry to flag upcoming failures. Without populated assets, Predictive Maintenance has nothing to predict.
Step 9: Common new-user mistakes
- Tracking only equipment you replaced — also log equipment that was already there when you took on the customer. The pre-existing units age and need replacement too; tracking them gives you the upsell window.
- Skipping serial numbers — without serial, warranty lookup fails and parts ordering becomes guesswork. 30 seconds to type during install; saves hours later.
- Not photographing dataplates — by year 5, the dataplate sticker is sun-bleached and unreadable. Photo on day-1 install is permanent record.
- Treating “Needs Repair” as a backlog instead of a pipeline — each entry is a customer call waiting to happen. Process the list weekly, not whenever you remember.
Real-World Example
A property manager calls about a noisy HVAC unit at “456 Oak Ave”. You search Properties, click into the building, see two HVAC assets installed in 2014 and 2019. The 2014 unit has 3 service calls in the last 18 months and is Poor condition. You click Generate Estimate — the quote pre-fills make/model, age, repair count, and a side-by-side new-unit option. Customer signs that afternoon: $9,400 install instead of another $400 patch.
What’s Next?
- Managing Properties — assets attach to properties
- Preventive Maintenance Schedules — auto-generate visits per asset
- Predictive Maintenance Setup — AI flags failures before they happen
- Inventory Management — keep replacement parts on the shelf
Need help? Post in the Tech Support category or contact support@exoserva.com.