Exoserva uses AI to automate routine tasks, suggest optimal scheduling, and provide predictive insights. The AI Automation settings let you control which AI features are active, customize AI behavior, and monitor AI usage costs. This guide walks you through configuring AI automation for your business.
Estimated time: 8 minutes
Before You Begin
- An active Exoserva account with Owner or Admin role
- A paid plan that includes AI features
Step 1: Navigate to AI Settings
From the left sidebar, click AI Automation (look for the CPU icon with a green activity dot). This opens the AI Automation Center – a dedicated page with four tabs across the top: Automations, Actions, Predictions, and Stats. The header displays a hero metrics row showing Active Automations, Executions Today, Pending Approvals, and Model Accuracy at a glance. If you do not see the AI Automation link, check that your plan includes AI features or ask your admin to enable them in Settings.
Tip: You can switch between tabs quickly using keyboard shortcuts: press Ctrl+1 through Ctrl+4 (or Cmd+1 through Cmd+4 on Mac) to jump directly to Automations, Actions, Predictions, or Stats. Press Ctrl+K to focus the search bar.
Step 2: View Automation Rules
The Automations tab is selected by default. This view shows the Automation Templates panel listing all configured AI rules. Each automation rule card displays a title, description, a toggle to enable or disable it, and a badge showing the number of times it has been enabled. Default rules include automatic job assignment based on technician skills and location, smart scheduling suggestions, and predictive maintenance alerts. The tab badge next to “Automations” shows the count of currently enabled rules so you can see at a glance how many are active.
Warning: Disabling an automation rule takes effect immediately. Any in-progress AI actions triggered by that rule will complete, but no new actions will be initiated.
Step 3: Configure a Rule
Click any automation rule card to expand its configuration panel. Each rule exposes parameters you can customize: Confidence Threshold (a percentage slider that determines how confident the AI must be before acting), Time Window (the scheduling range the AI considers when making suggestions), and Priority Levels (which job types the rule applies to). Each parameter includes a description tooltip explaining its effect on AI behavior. After adjusting parameters, click “Save” to apply your changes – a green success toast confirms the update.
Step 4: Set Up AI Dispatch
The AI Dispatch feature is one of the most impactful automation rules. Find it in the Automations tab or search for “dispatch” using the search bar at the top (Ctrl+K). The dispatch configuration includes: Maximum Travel Time (how far the AI will send a technician), Skill Matching (whether the technician must have exact skills or close matches are acceptable), Workload Balancing (distribute jobs evenly or prioritize proximity), and Job Type Filters (enable or disable AI dispatch per service category). Toggle AI dispatch on for specific job types by clicking the enable switch next to each job category.
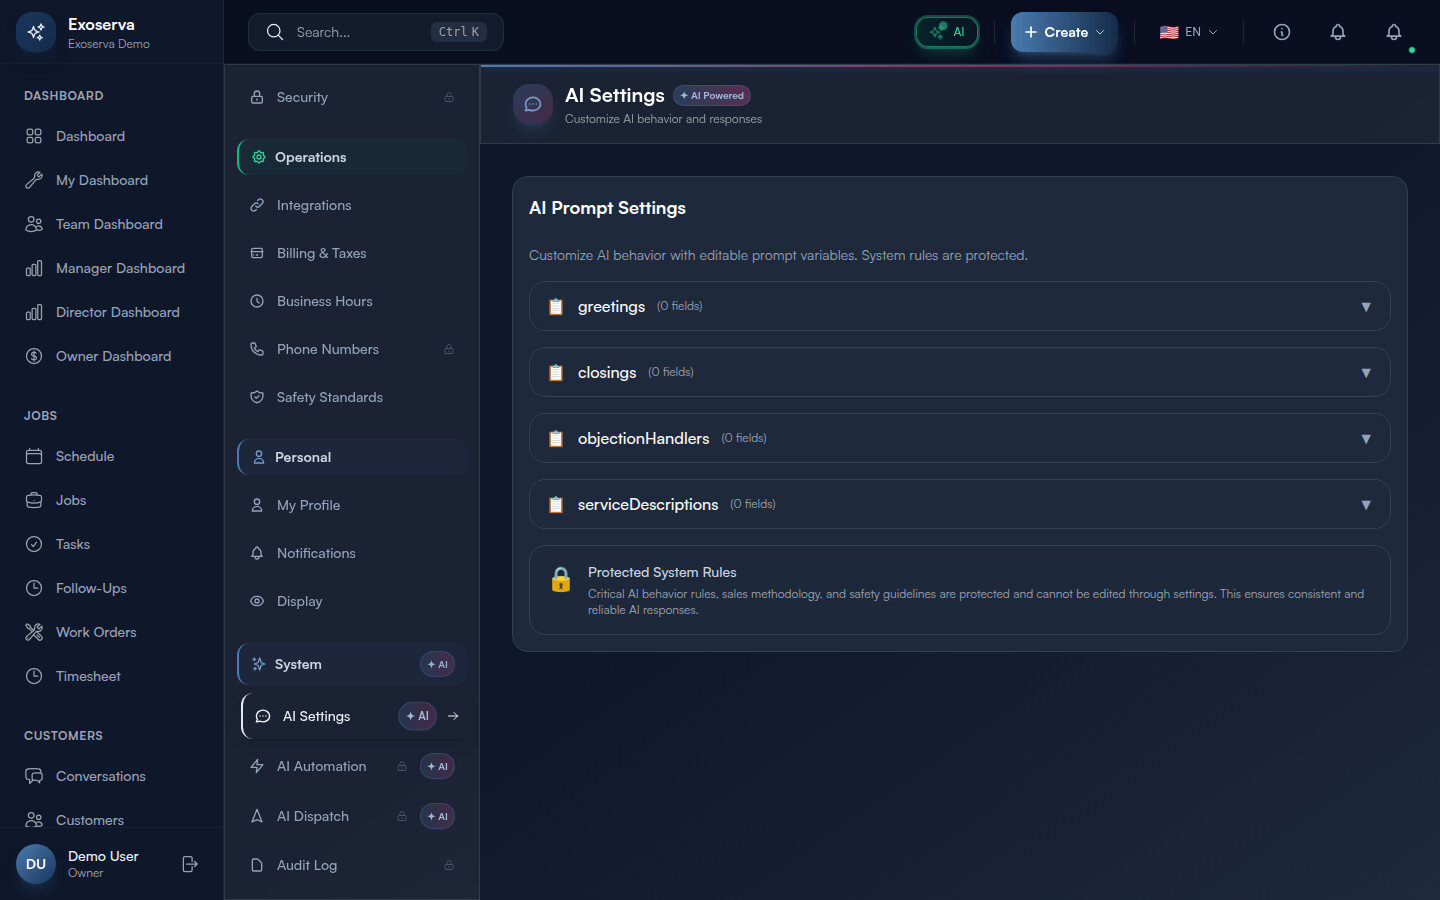
Step 5: Customize AI Prompts
Navigate to the AI Settings Hub (sidebar Settings then AI Settings under System) to find the prompt customization section. The Global Settings panel provides fields for: System Prompt (the base instructions the AI follows when interacting with customers and generating suggestions), Business Context (a free-text field where you describe your services, service area, and customer communication style), and Language Preference plus Timezone (which control how the AI formats dates, currency, and messages). Edit any field and click “Save Settings” at the bottom of the panel. The AI applies your changes to all future interactions immediately.
Step 6: Monitor AI Usage and Costs
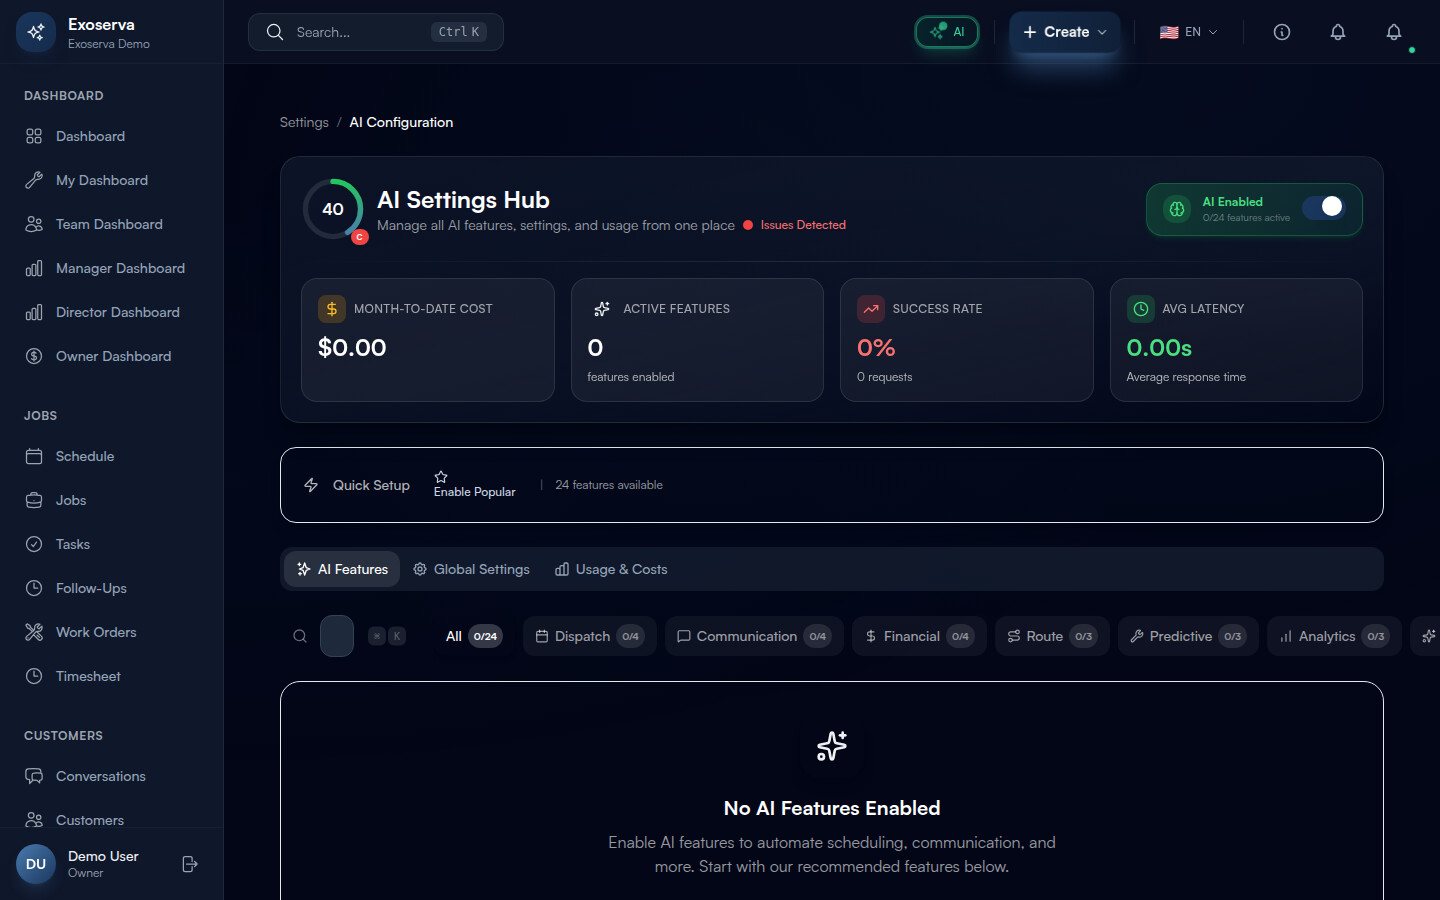
Click the Stats tab in the AI Automation Center. The top of the page displays four stat cards: Active Automations (how many rules are enabled out of total), Executions Today (with a “this week” subtitle), Pending Approvals (actions awaiting your review), and Actions Executed (with approved and rejected counts). Each card shows a trend indicator with a percentage and an up/down arrow in green or red.
Below the stat cards, the AI System Health panel shows four metrics: System Status (a green “Online” badge with a pulsing dot), Total Executions (lifetime count), Prediction Accuracy (color-coded: green for 80%+, amber for 60-79%, red below 60%), and Active Automations count. For detailed cost tracking, visit the dedicated AI Costs page (sidebar, under Analytics) which breaks down spending by agent type, model, and time period with daily usage charts and budget management.
What’s Next?
Now that you’ve completed this guide, check out:
Need help? Post in the Tech Support category or contact support@exoserva.com.