Your customer database is the foundation of your business. Exoserva keeps all customer information, job history, invoices, and communication in one place. This guide shows you how to add customers, view their details, and use the customer profile to manage your relationship effectively.
Estimated time: 8 minutes
Before You Begin
- An active Exoserva account with Owner, Manager, or Dispatcher role
- You are logged in to the Exoserva platform
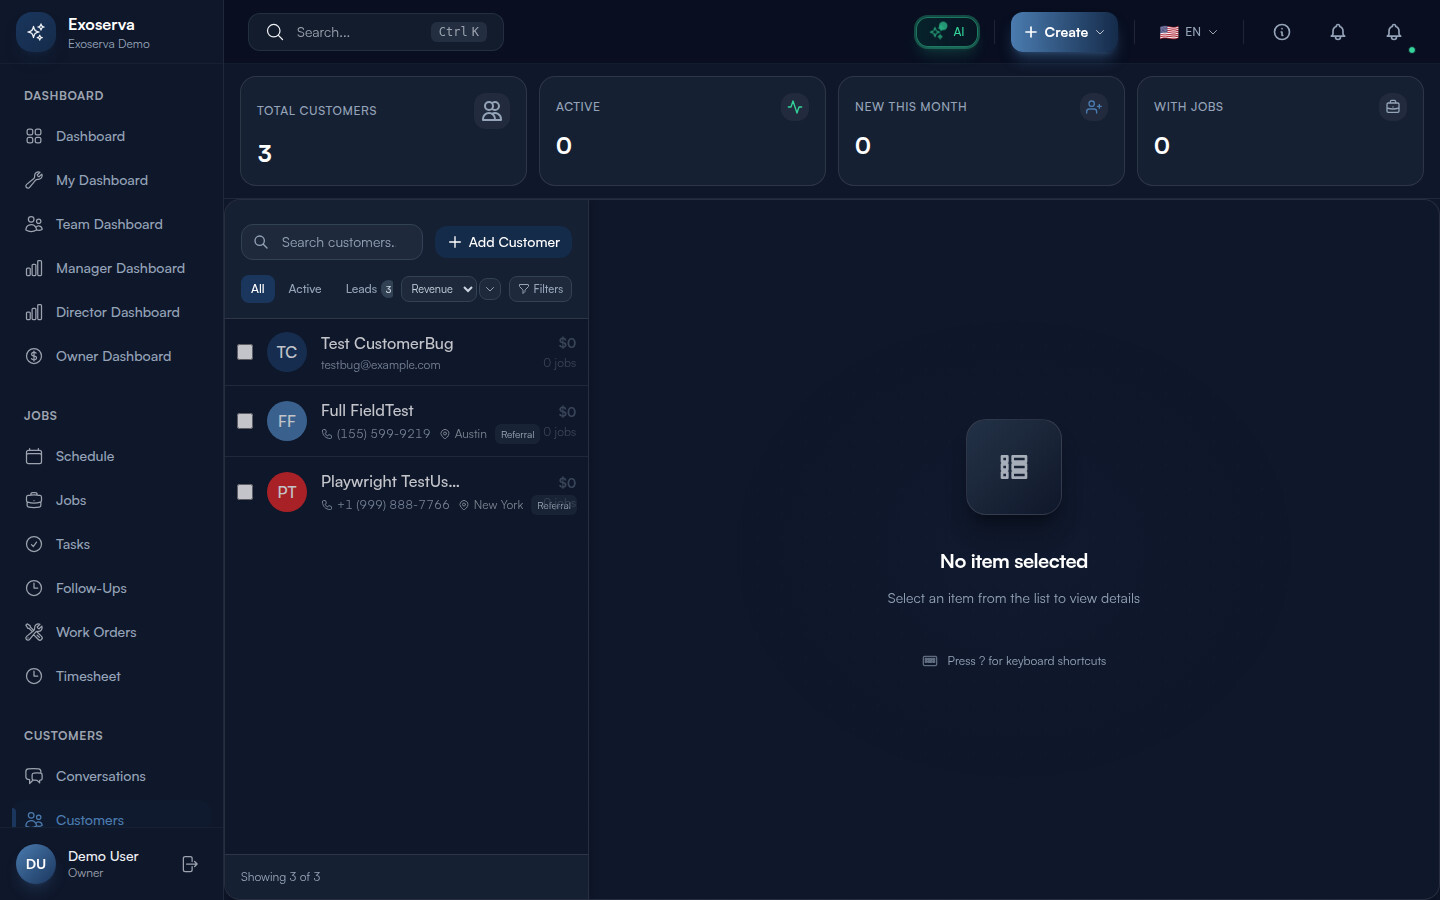
Step 1: Navigate to the Customers Page
Click “Customers” in the left sidebar. The Customers page opens with a split-panel layout: a list panel on the left and a detail panel on the right. At the top of the page, a stats grid displays four summary cards: Total Customers (total count with a users icon), Active (customers with a job in the last 30 days, shown with a green activity icon), New This Month (customers added this calendar month, shown with a primary-colored user-plus icon), and With Jobs (customers who have had at least one job, shown with a briefcase icon). Hover over any stat card to see a tooltip with additional context.
Tip: Use keyboard navigation to quickly browse customers: press the up and down arrow keys to move through the customer list, Enter to select a customer and open their detail panel, and Escape to deselect. This is much faster than clicking when reviewing multiple records.
Warning: The stats cards reflect live data and may take a moment to load. If you see a pulsing skeleton animation instead of numbers, wait a few seconds for the data to populate.
Step 2: Search and Filter Customers
Below the stats grid, the list panel header contains a search bar, an “Add Customer” button, and a row of filter controls. The search bar (with a magnifying glass icon and “Search customers…” placeholder text) matches on name, email, phone, address, and notes simultaneously. Type any keyword and the list filters in real time as you type. Your recent searches are saved and appear as suggestions when you focus the search bar.
Below the search bar, the CustomerFilters component provides segment filters (All, Active, Prospects, Follow-Up), sort controls (sort by name, revenue, last contact, or creation date, with ascending/descending toggle), source filters (filter by lead source such as Google, Thumbtack, Referral), date range filters, and revenue range filters. You can also save your current filter combination as a named preset for quick access later.
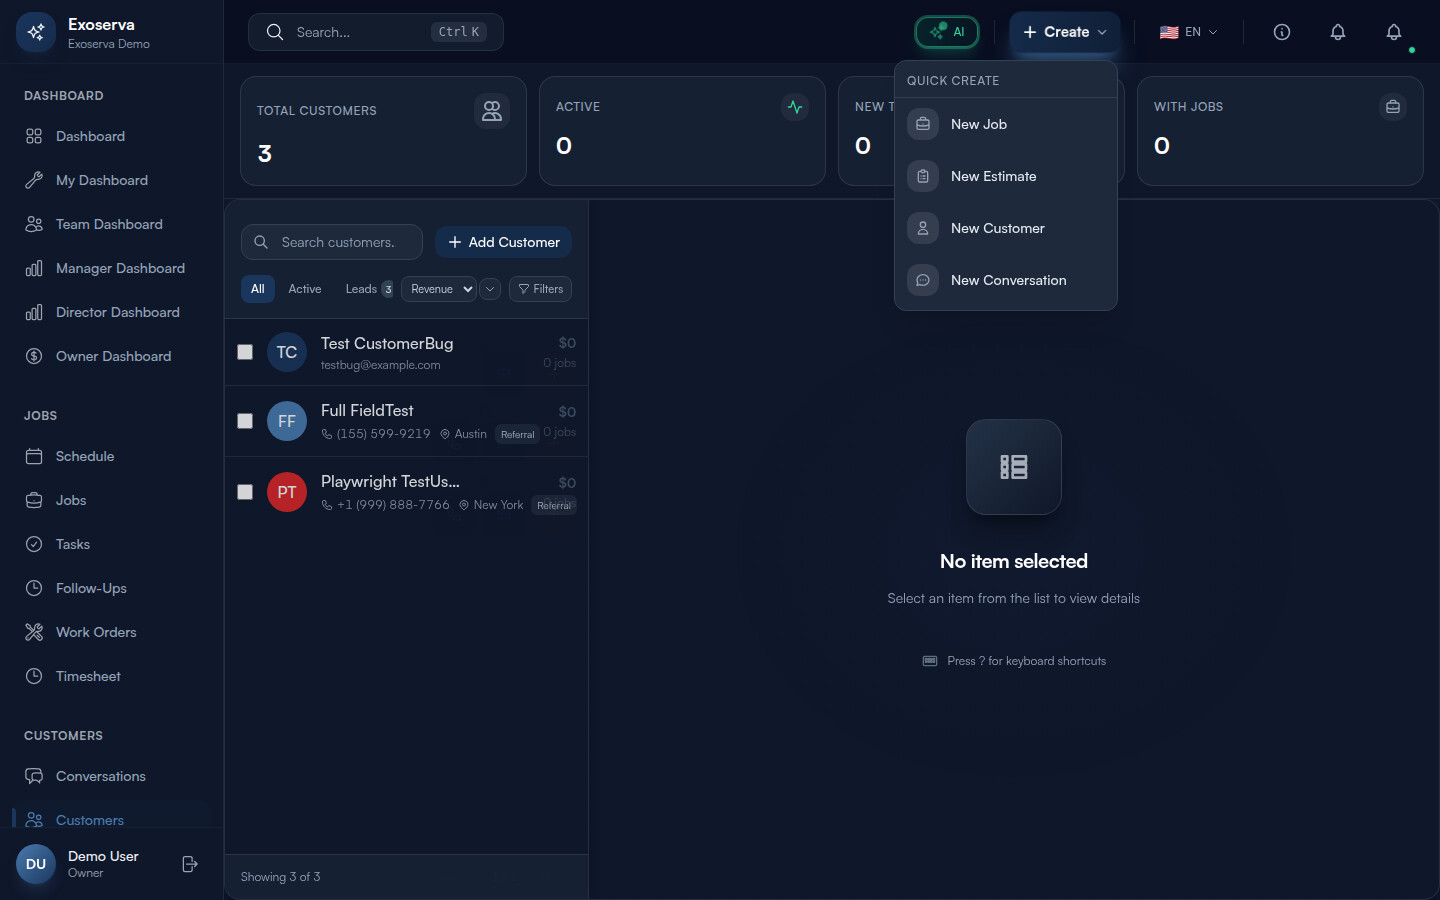
Step 3: Add a New Customer
Click the “Add Customer” button (the primary-colored button with a plus icon) in the top-right corner of the list panel. The detail panel on the right transforms into a creation form titled “Add Customer” with a user-plus icon header.
The form contains the following fields: First Name (text, required, marked with an asterisk), Last Name (text, required, marked with an asterisk), Email (email input with a mail icon, optional but validated on blur), Phone (phone input with country code selector, optional but validated on blur), City (text with a map-pin icon, optional), Lead Source (dropdown with options like Google, Thumbtack, Referral, Website, and others), and Notes (multi-line textarea for internal notes). Fields validate in real time as you type and on blur. Valid email addresses show no error; invalid ones display a red error message below the field. The same applies to phone numbers.
At the bottom of the form, click “Create Customer” (the primary button) to save, or “Cancel” to discard. The Create Customer button is disabled until both First Name and Last Name are filled in and no validation errors are present. While saving, the button shows a spinning loader icon.
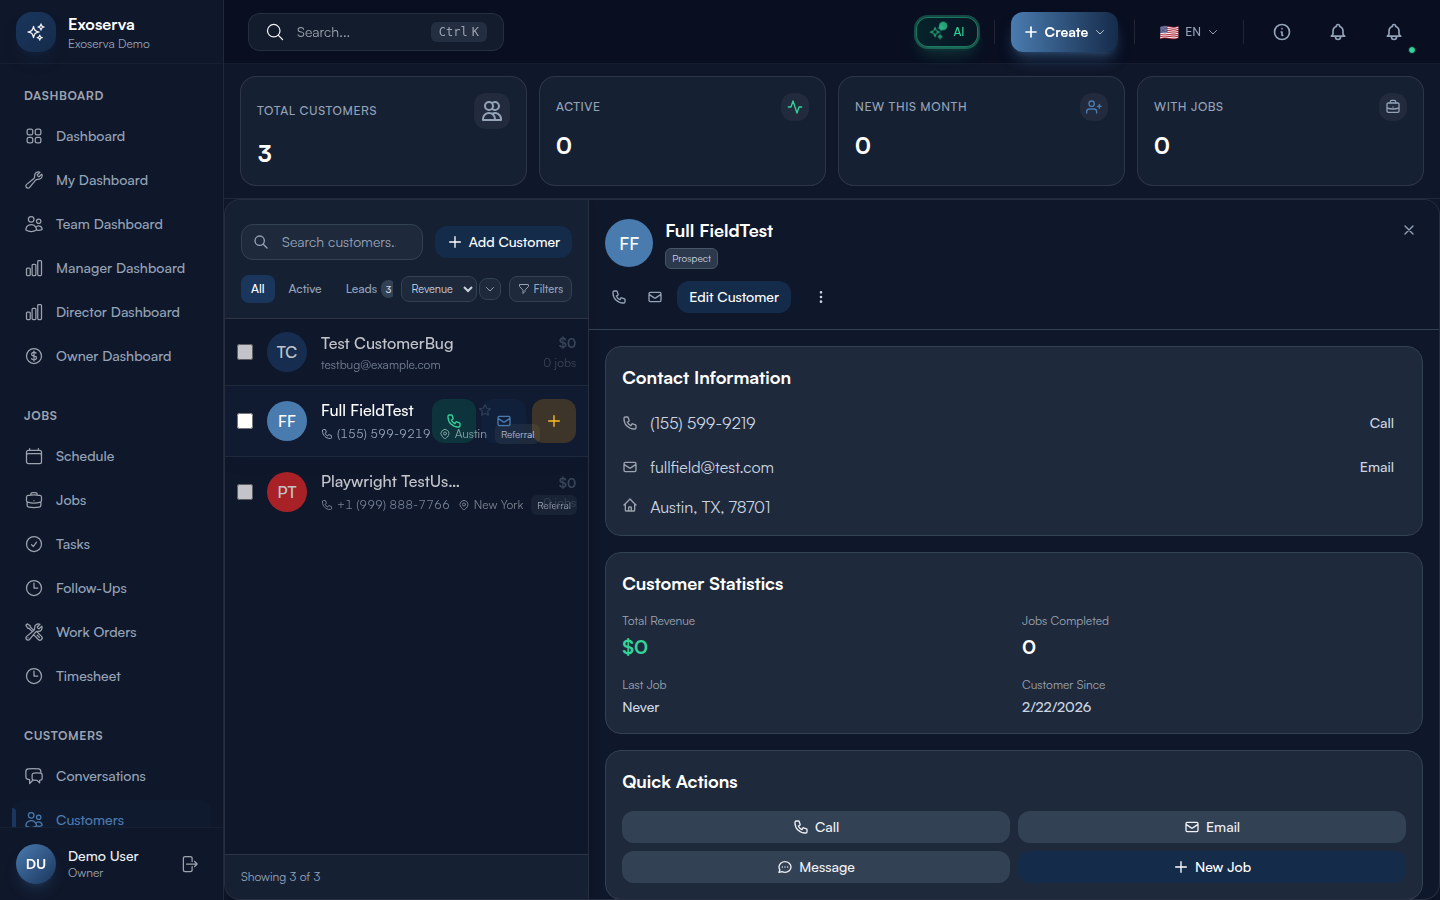
Step 4: View the Customer Detail Panel
Click any customer row in the list to open their full profile in the detail panel on the right. The detail panel header shows the customer’s avatar (generated from their initials), full name, a customer tier badge (Platinum, Gold, Silver, Bronze, or Prospect, color-coded with gradient backgrounds), and a VIP badge if applicable. Below the header, you will find action buttons: Edit (pencil icon), a dropdown menu (three dots) with options like Delete, and a close button (X icon) to deselect the customer.
The main content area contains collapsible sections, each with a header you can click to expand or collapse: AI Insights (AI-generated analysis of the customer with sentiment score and churn risk), Contact Information (email, phone, address displayed on a mini map preview), Jobs (chronological job history with status and amounts), Invoices (linked invoices with status filter), Activity Timeline (recent interactions and events), and Notes (internal team notes).
Step 5: Review Job History
In the customer detail panel, expand the Jobs section by clicking its header. This shows every job associated with the customer in chronological order. Each job entry displays a status badge (color-coded: green for completed, amber for in progress, blue for scheduled), the scheduled date, assigned technician name, and total amount. Click any job row to navigate directly to the job detail page.
The job history section also shows a summary badge in the section header indicating the total number of jobs. Reviewing job history before a service call helps technicians understand the customer’s equipment, past issues, and service patterns.
Step 6: View Customer Invoices
Expand the Invoices section in the customer detail panel to see all invoices linked to this customer. Each invoice row shows the invoice number, date, total amount, and a status badge (Draft, Sent, Paid, or Overdue, each color-coded). Filter by status using the filter controls within the section to quickly find outstanding balances. The section header badge shows the total invoice count, and summary figures for lifetime revenue and average invoice value may appear at the top of the section.
Step 7: Edit Customer Information
From the customer detail panel, click the “Edit” button (pencil icon) in the header. An edit modal opens as a slide-over or dialog with all the customer’s current information pre-filled in editable fields. Update any field including name, email, phone, address, lead source, and notes. The form uses the same validation as the creation form – email and phone are validated on blur with visual feedback. Click “Save” to persist your changes or “Cancel” to discard. A success toast notification appears confirming the update, and the customer list refreshes automatically to reflect the changes.
Step 8: Use Bulk Actions
In the customer list panel, each customer row has a checkbox on the left side. Check multiple customers to activate the bulk action toolbar, which appears at the top of the list with a primary-tinted background. The toolbar shows the count of selected customers (e.g., “3 selected”) and provides two bulk action buttons: “Email” (mail icon, opens your email client with all selected customers’ email addresses pre-filled in the To field) and “Export” (download icon, generates a CSV file with Name, Email, Phone, Revenue, and Last Contact columns for the selected customers). Click the X button on the toolbar to clear your selection.
What’s Next?
Now that you’ve completed this guide, check out:
Need help? Post in the Tech Support category or contact support@exoserva.com.