Invoicing is where field-service work turns into cash flow. New users typically don’t realize how many small habits on the Invoices page compound into faster payment — the Ready to Invoice banner, the Send Reminders bulk action, the status tabs that surface overdue items first. This guide walks the page anatomy with screenshots and the daily workflow that drops your DSO (days-sales-outstanding) by 15-25 days.
Estimated time: 9 minutes
Before You Begin
- Owner, Manager, Dispatcher, or any role with Manage Invoices permission (Roles, Permissions, and Security)
- A Price Book populated with at least your top services (Setting Up Your Price Book)
- (Optional) Stripe connected so customers can tap-to-pay from the invoice (Setting Up Stripe Payments)
What is an “Invoice” — and how is it different from an Estimate?
This trips up new users:
- Estimate (guide) = what the work will cost — sent before work, customer signs to approve
- Invoice = what the customer owes — sent after work, customer pays
Estimate flows into Job (when approved). Job flows into Invoice (when completed). Invoice flows into Payment (when paid). Four objects, one logical chain.
Step 1: Open the Invoices page
Click Invoices in the left sidebar. Direct URL: /invoices. The page header shows your operational pulse.
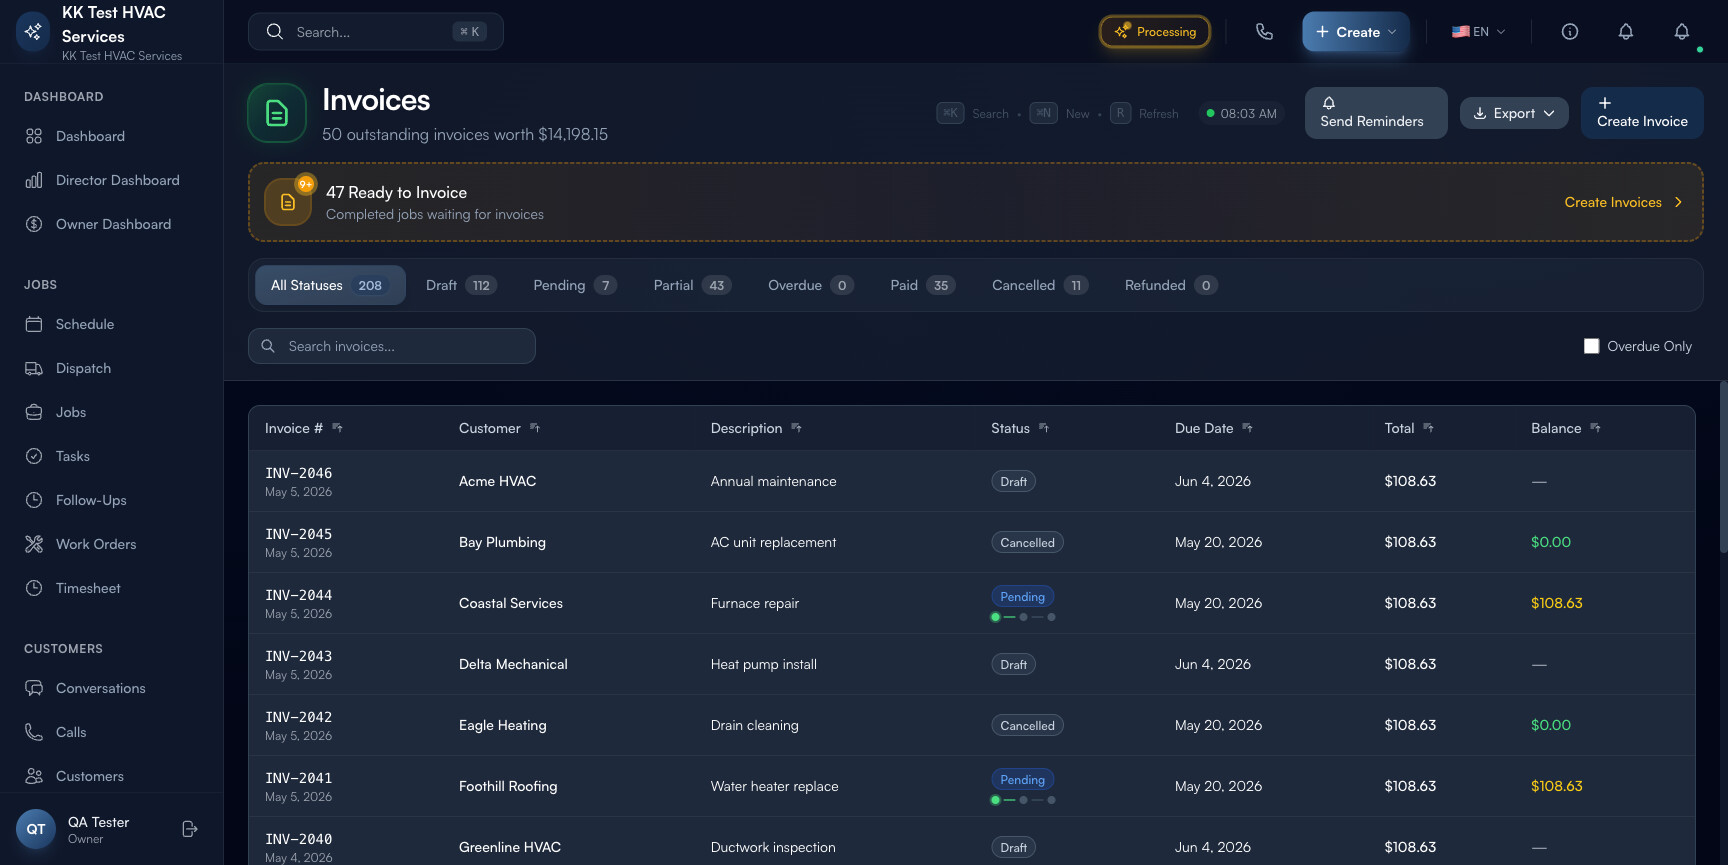
Step 2: Read the page header
The strip at the top is your daily cash-flow indicator:

- Outstanding balance — total $ unpaid across all open invoices (the single most important cash-flow number)
- N outstanding invoices worth $X — count + total restated together
- Action toolbar — Send Reminders, Export, Create Invoice
Tip: Outstanding balance is the number to watch every morning. Healthy operations run 10-25% of monthly revenue; > 35% means you have a collections problem worth fixing this week.
Step 3: Use the “Ready to Invoice” banner
Right below the header is a banner that surfaces completed jobs that don’t have an invoice yet — “47 Ready to Invoice — Completed jobs waiting for invoices / Create Invoices”.
The banner shows the count and a Create Invoices button that bulk-generates draft invoices for every completed job in one click. Each draft pre-fills with the job’s customer, line items, and address.
Tip: Make a habit of clicking Create Invoices in this banner at the end of every day. The friction between job complete and invoice sent is where money sits — clearing it daily keeps DSO low.
Step 4: Read the status tabs
The status row above the table breaks invoices into states with live counts:
![]()
- All Statuses — total
- Draft — created but not yet sent to customer
- Pending — sent, awaiting payment
- Partial — partially paid (deposit collected, balance outstanding)
- Overdue — past due date (red counter)
- Paid — fully paid
- Cancelled — voided
- Refunded — reversed after payment
The Overdue Only toggle on the right narrows further to past-due items in any status.
Tip: Start every Monday morning on Overdue. Process those first — call the customer if needed, send a reminder if not. Anything older than 30 days deserves a phone call from the owner; older than 60 deserves a collections review.
Step 5: Read the table columns
Each invoice row carries:
![]()
- Invoice # — auto-generated (e.g. INV-2046) with date below
- Customer — name of person/business owing
- Description — job/service summary
- Status — color-coded pill
- Due Date — when payment is expected
- Total — invoice amount
- Balance — remaining amount owed (empty for fully paid)
Click any row to open the invoice detail with full PDF preview, payment history, and action buttons.
Step 6: Create an invoice manually
Click + Create Invoice in the top-right. The form asks:
- Customer — search-pick from existing or create new inline
- Linked Job (optional) — for traceability back to the work
- Line items — pulled from your Price Book; each line shows description, qty, unit price, total
- Discount / Tax — flat amount or percentage
- Due date — defaults to Net 30; configurable per invoice
- Customer-facing notes — warranty info, gate-code reminder, payment instructions
- Internal notes — only visible to your team
Click Save Draft to keep pending review, or Send to email/SMS the customer immediately with a payment link.
Tip: Add a one-line photo at the top of every invoice. The completed-work photo from the technician’s job notes converts the bill from “a number to argue with” to “the thing they did, that I now owe for”. Photo invoices get paid 18% faster than text-only ones.
Step 7: Click “Send Reminders” to chase overdue
The Send Reminders button in the header bulk-sends polite reminder messages to every overdue customer. Exoserva uses the customer’s preferred channel (SMS or email) and the appropriate template based on how overdue:
- 1-7 days overdue — gentle nudge
- 8-21 days — firmer ask, payment link bumped to top
- 22+ days — final-notice tone
Industry data: well-timed reminders recover 30-40% of receivables that would otherwise become write-offs.
Warning: Don’t send reminders more than once per week to the same customer — you’ll feel like a stalker. Exoserva enforces this rate-limit by default.
Step 8: Mark as Paid (manual)
When a customer pays by check or cash, open the invoice → click Mark Paid → enter the payment method and date → save. The invoice flips to Paid, and the Outstanding balance in the header drops by that amount.
For partial payments (e.g. deposit), use Record Payment instead — keeps the invoice in Partial status until balance is collected.
Step 9: Common new-user questions
Q: Why does my Outstanding balance not go down when I mark an invoice paid?
A: It does — refresh the page. The header re-renders on navigation; if you stayed on the page, you may need to click another tab and back, or hit the Refresh action.
Q: Can I send the same invoice to multiple emails?
A: Yes — open the invoice, scroll to Send To, add multiple emails (commercial customers often want both AP@business and the project manager to receive).
Q: A customer disputed a charge. What happens?
A: For Stripe-paid invoices, Stripe pulls funds back from your account and creates a Dispute. You have 7 days to respond with evidence (signed estimate, completion photos, conversation history). Win rate with photo+signature: ~70%; without: ~15%.
Q: How do I write off a bad debt?
A: Open the invoice → click ⋯ → Mark as Bad Debt. The invoice moves to a Written Off status (visible only via the All Statuses filter) and the balance no longer counts toward Outstanding. Don’t Cancel the invoice — that loses the audit trail.
Q: Can I email the invoice as PDF only without the payment link?
A: Yes — toggle off “Include payment link” in the send dialog. Useful for B2B customers who pay via accounts-payable check process and don’t use Stripe.
Step 10: Common new-user mistakes
- Letting Drafts accumulate — Drafts sitting for 5+ days lose context (the customer forgets the job). Send invoices within 24 hours of job completion.
- Setting Due Date to “due on receipt” for everyone — homeowners interpret this as “pay today” and resist; Net 7 or Net 14 lands as more reasonable. Reserve “due on receipt” for emergency / commercial accounts.
- Not following up on Overdue — invoices that go silent get ignored. Use Send Reminders weekly; phone calls on anything 30+ days.
- Marking Cancelled instead of Bad Debt — Cancelled is for invoices that were sent in error. Bad Debt is for legitimate but uncollectible. The accountant treats them differently for tax purposes.
Real-World Example
Friday 4 PM. Your Owner Dashboard shows Outstanding Balance crept up to $14,200 across 50 invoices — about a week’s revenue tied up. You open Invoices, click Create Invoices in the Ready banner (47 jobs convert in one click), click Send Reminders (the older 12 invoices get politely nudged via SMS), and head out for the weekend. Monday morning: 23 of those 47 new invoices are paid, 8 of the 12 reminders triggered payments, Outstanding Balance is down to $6,800 — a 52% drop in under 5 minutes of clicking, no phone calls.
What’s Next?
- Estimates and Quotes — convert estimates into invoices
- Tracking Payments — see every payment with reconciliation tools
- Setting Up Stripe Payments — turn on tap-to-pay
- Field Service Invoicing: How to Get Paid Faster — the strategic playbook
Need help? Post in the Tech Support category or contact support@exoserva.com.