Connecting your Google Calendar to Exoserva keeps your scheduled jobs and your personal life in one view — so you stop double-booking yourself for a tech-ride-along on the morning of your kid’s recital. This guide walks through the OAuth handshake, the four sync toggles that actually matter, and the privacy controls that keep customer addresses out of a shared family calendar.
Estimated time: 6 minutes
Before You Begin
- Owner, Tenant Administrator, or any role with Manage Integrations permission (Roles, Permissions, and Security)
- A Google account with the calendar you want to sync (personal or Workspace both work; Workspace admins may need to allow Exoserva in the Workspace marketplace first)
- A few minutes — the OAuth handshake takes 30 seconds; choosing the right sync settings is where the time goes
Step 1: Open Integrations
From any page, press ⌘K to open Settings, then click Integrations under Operations. Direct URL: /settings/integrations. You’ll see a grid of every available integration.
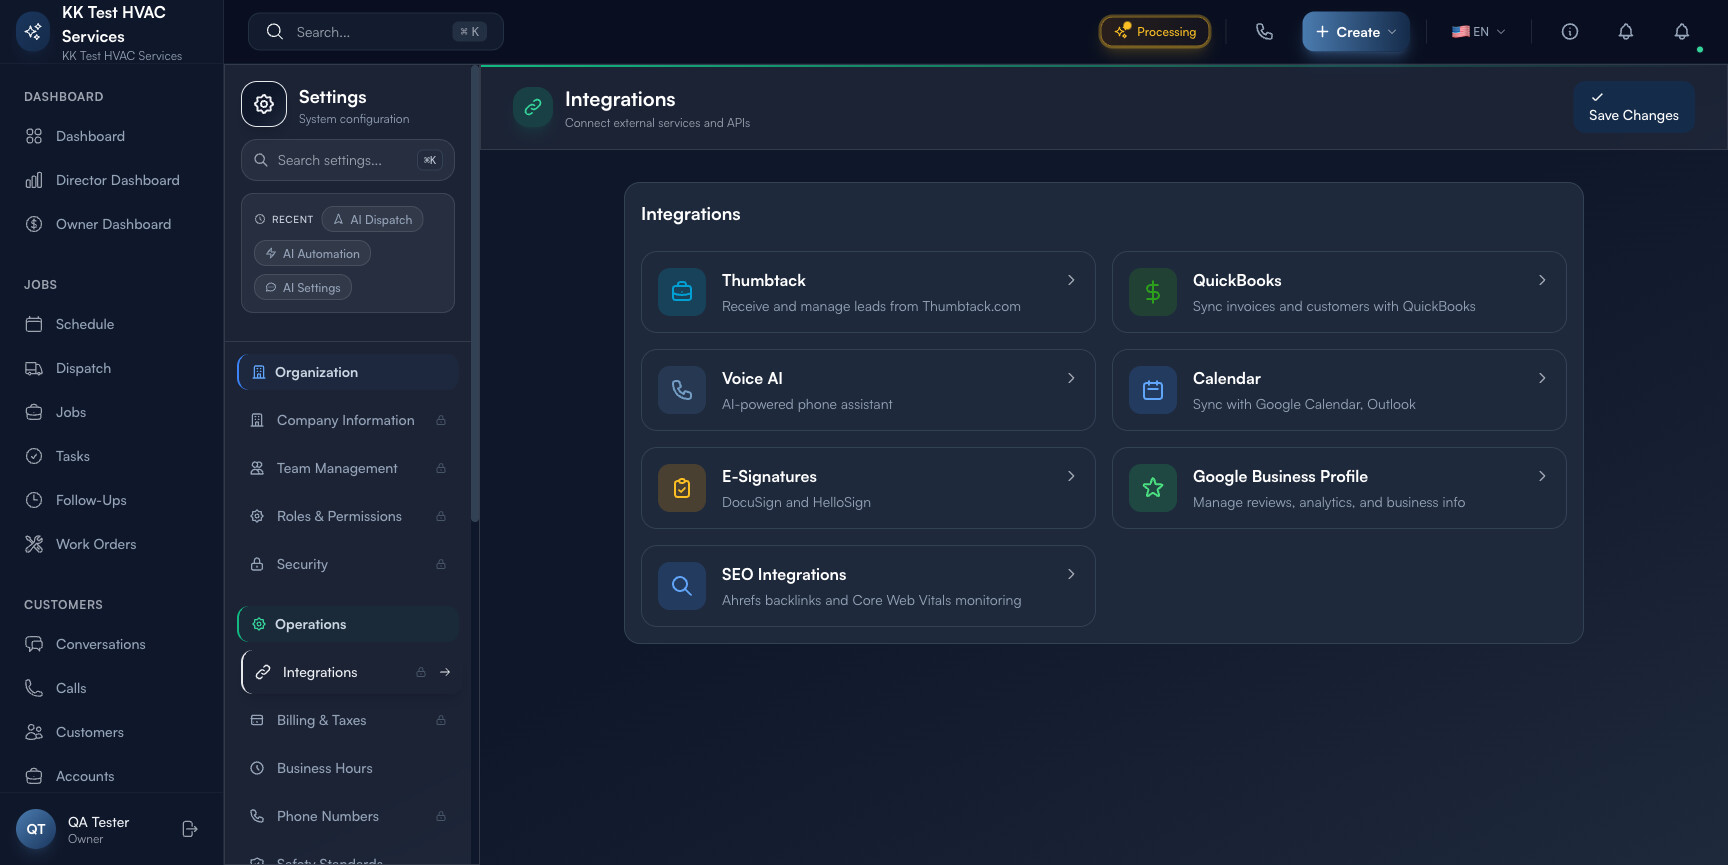
The cards on the page are mostly self-explanatory: Thumbtack (lead intake), QuickBooks (accounting), Voice AI (the phone receptionist), Calendar (this guide), E-Signatures (DocuSign / HelloSign), Google Business Profile (review management), SEO Integrations (Ahrefs + Web Vitals).
Step 2: Open the Calendar integration
Click the Calendar card. The page navigates to /settings/calendar. The header tells you exactly where you stand: “0 of 2 calendars connected” (or 1 of 2 / 2 of 2 once you’re up and running).

The page is organized into three vertical zones:
- Why connect your calendar? — three benefit cards (see personal appointments alongside jobs, block personal time, real-time tech availability sync)
- Connected Calendars — Google Calendar and Microsoft Outlook with Connect buttons
- Sync Settings — toggles for what flows in which direction
Step 3: Click Connect on Google Calendar
In the Connected Calendars row, click the Connect button next to Google Calendar.

You’ll be redirected to Google’s OAuth consent screen, where you:
- Sign in to the Google account you want to connect (use the contractor-business account, not a personal one if you can help it)
- Review the requested scopes — Exoserva asks for read access to events (so it can show your personal calendar inside the schedule view) and write access (so it can create events for jobs and estimates)
- Click Allow — Google redirects you back to Exoserva, which now shows the calendar as Connected with the email address it’s tied to
Tip: If you see “This app isn’t verified” during OAuth, that means your Workspace admin hasn’t approved Exoserva yet. Take the screenshot to your admin (or message them with the workspace URL) — adding Exoserva to the allowlist is a one-click action they can do from the Workspace admin console.
Step 4: Configure Sync Options
Below the Connected Calendars panel, you’ll see Sync Settings with two columns: Sync Options (what to sync) and Privacy (what to expose).
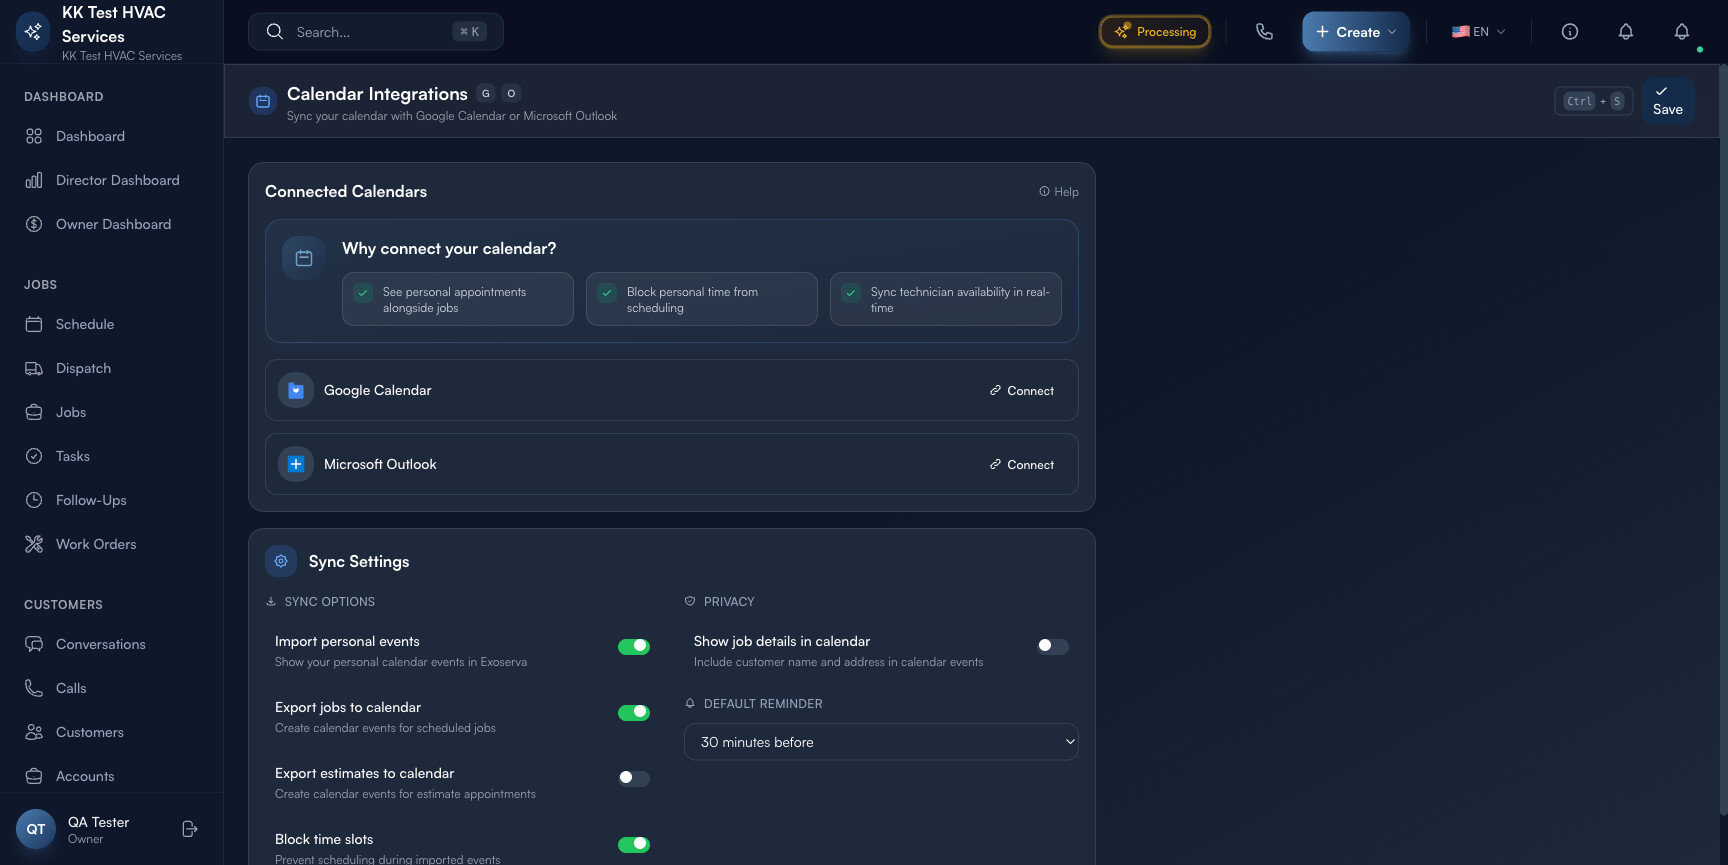
The four Sync Option toggles, top to bottom:
- Import personal events — your Google events appear inside Exoserva’s Schedule board so you don’t double-book a tech ride-along on top of a dentist appointment
- Export jobs to calendar — every scheduled job creates a Google Calendar event with the customer name and address (subject to the Privacy toggle below)
- Export estimates to calendar — same as jobs, but for estimate appointments (the visit where you write up a quote, not the visit where you do the work)
- Block time slots — imported events count as busy in Exoserva’s scheduling logic, so a dispatcher trying to assign you a job during your dentist appointment gets blocked
Step 5: Set Privacy controls
The Privacy column has one toggle: Show job details in calendar — Include customer name and address in calendar events.
When on, the Google Calendar event reads “AC tune-up — Acme HVAC, 123 Main St”. When off, the event reads “Exoserva job” with no identifying info.
Warning: If your Google Calendar is shared with family members, contractors, or a virtual assistant who shouldn’t see customer addresses, turn this off. Once a calendar event exists, anyone with view access to that calendar sees the customer name and address — there’s no way to retroactively redact.
Step 6: Choose a Default Reminder
The Default Reminder dropdown sets when Google notifies you (and your team) about a job event:
- No reminder — the safest if your team has reminder fatigue from too many tools
- 15 / 30 minutes before — for techs who use Google Calendar as their morning briefing
- 1 hour / 2 hours before — gives time to gather parts before driving out
- 1 day before — useful for rare/specialty jobs that need overnight prep
Pick once, save, change later if it’s wrong. There’s no per-job override in this version — every Exoserva-created event uses this default.
Step 7: Save and verify
Click Save Changes in the top-right (or Ctrl+S / ⌘S). The header counter should now read “1 of 2 calendars connected”. Verify by:
- Opening Google Calendar in a new tab — you should see your existing personal events untouched
- Creating a test job in Exoserva for tomorrow — within 30 seconds, a matching event appears in Google Calendar
- Adding a personal event in Google for tomorrow afternoon — within 30 seconds, that event appears in Exoserva’s Schedule board as a busy block
If any of these don’t happen, reopen the Calendar integration page and check the Connected Calendars panel — a recently-revoked OAuth token shows up here as “Disconnected” with a re-Connect button.
Step 8: Disconnect (if you ever need to)
To disconnect, return to /settings/calendar and click Disconnect next to the calendar entry. This:
- Stops further bidirectional sync (existing events stay where they are; nothing gets deleted)
- Revokes Exoserva’s OAuth token at Google (you can confirm at
myaccount.google.com/permissions) - Returns the connection counter to “0 of 2 calendars connected”
Tip: Disconnect before changing the Google account this connection is tied to. Re-OAuth as the new account; old events stay attached to the original Google account but don’t sync anymore.
Real-World Example
You’re a single-truck plumber. You have a 1 PM emergency call on Friday and you’ve already promised your daughter you’d pick her up from soccer at 4:30 PM. You enable Calendar integration, turn on Block time slots, and add the soccer pickup as a recurring weekly event in Google Calendar. Two weeks later, your dispatcher tries to book a “could turn into a 2-hour job” inspection at 3:30 PM — Exoserva’s schedule board shows the 4:30 PM block, the slot is disabled, and the inspection gets booked for Saturday morning instead. No awkward customer call mid-soccer-game, no unhappy daughter.
What’s Next?
- Using the Schedule Board — see Google events inside the schedule
- Setting Up Stripe Payments — next integration to turn on
- Connecting QuickBooks — accounting two-way sync
- Migrating from Another Platform — bulk-import existing schedule entries
Need help? Post in the Tech Support category or contact support@exoserva.com.