Your company profile is the foundation of your Exoserva workspace. It determines how your business appears on invoices, estimates, and customer-facing communications. This guide walks you through configuring your company information so everything looks professional and consistent from the start. Taking a few minutes to complete this setup now will save you time later.
Estimated time: 10 minutes
Before You Begin
- An active Exoserva account (see “Creating Your Exoserva Account” guide)
- You are logged in with an Owner or Admin role
- Your business details on hand (address, phone, website, logo file)
Step 1: Navigate to Settings
Click the gear icon or “Settings” in the sidebar navigation on the left side of your screen. The Settings hub will open, showing a categorized grid of 16 settings sections organized into four groups: Organization, Operations, Personal, and System. You will find Company Info at the top of the Organization group.
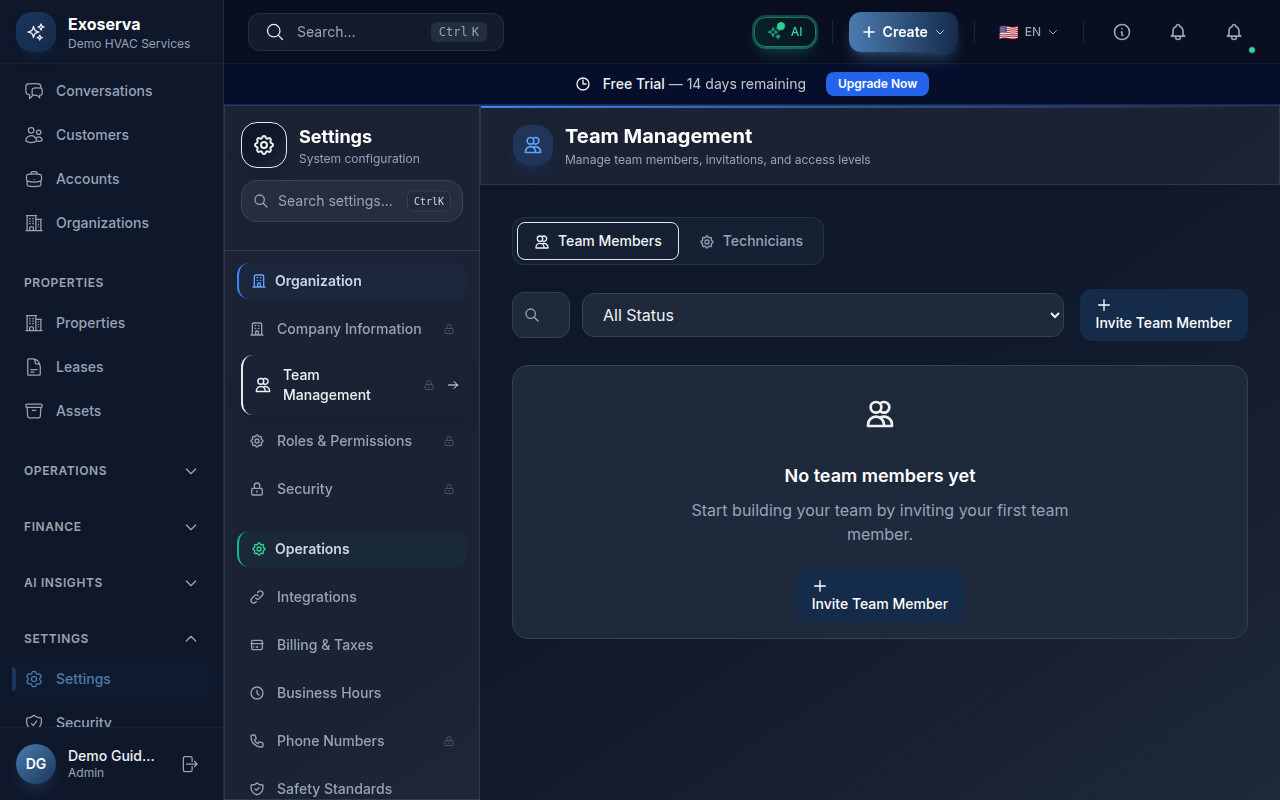
Tip: The Settings hub has a search feature and supports pinning your most-used sections. Pin Company Info if you plan to come back and update it frequently.
Step 2: Open Company Info
Click on the “Company Info” card in the Organization section. It is represented by a building icon. This opens the company profile form where you can enter and edit all your business details. If this is your first time here, most fields will be empty or populated with the company name you entered during signup.
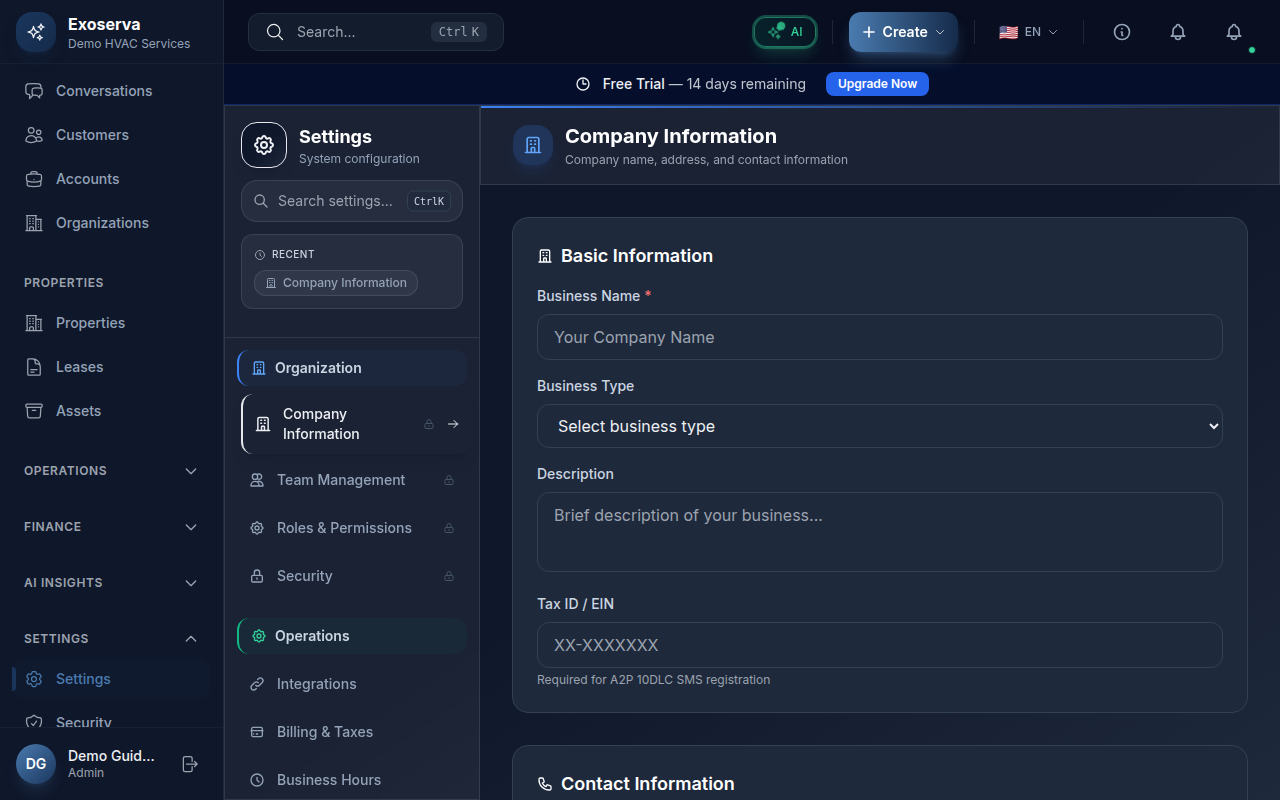
Step 3: Enter Your Business Name and Type
In the Business Name field, enter the official name of your company as you want it to appear on invoices and customer communications. Select your business type or industry from the available options. This helps Exoserva tailor features and AI recommendations to your specific trade, whether you are in HVAC, plumbing, electrical, general contracting, or another field service industry.
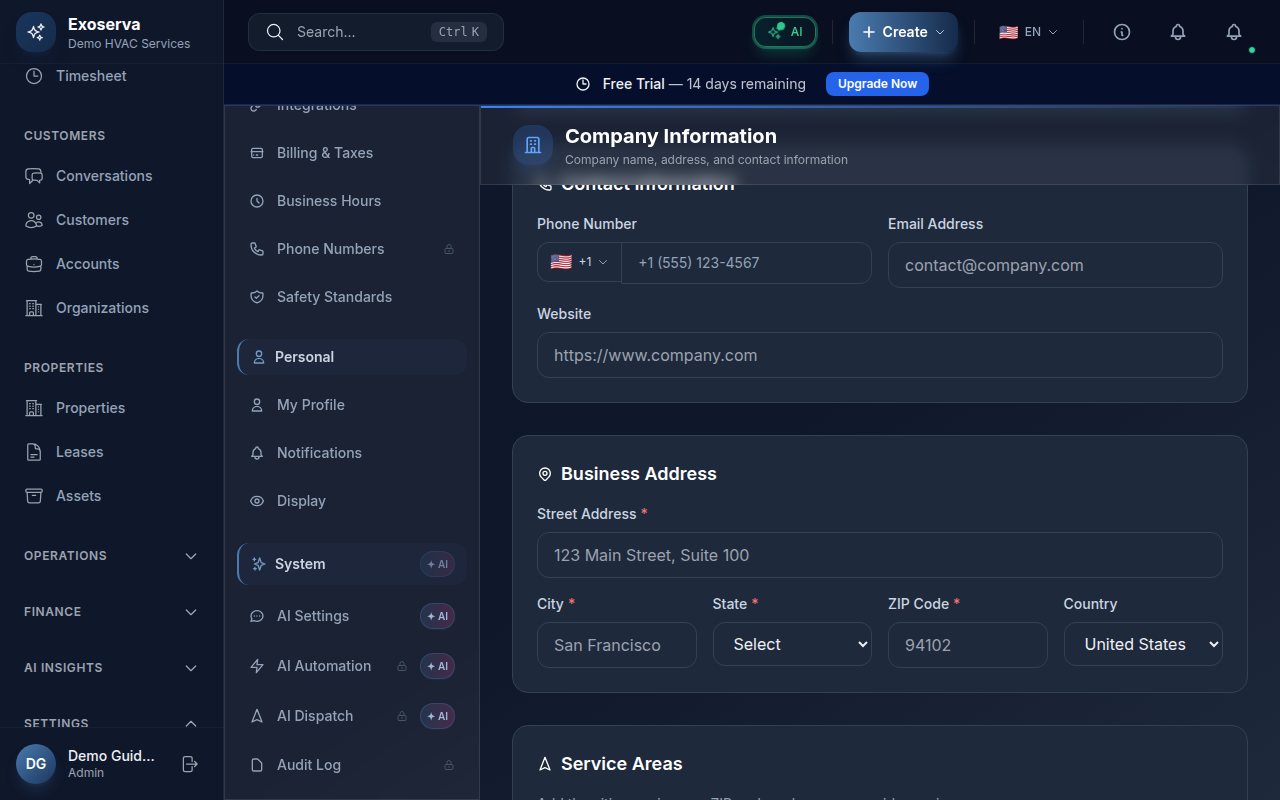
Step 4: Add Contact Information
Fill in your business phone number, email address, and website URL. The phone number appears on invoices and is used for customer-facing communications. The email address is used as the “from” address for automated emails like appointment confirmations and invoice notifications. Your website URL is included in the footer of customer-facing documents.
Warning: Make sure the email address you enter is one your team actively monitors. Automated notifications and customer replies will be sent to this address.
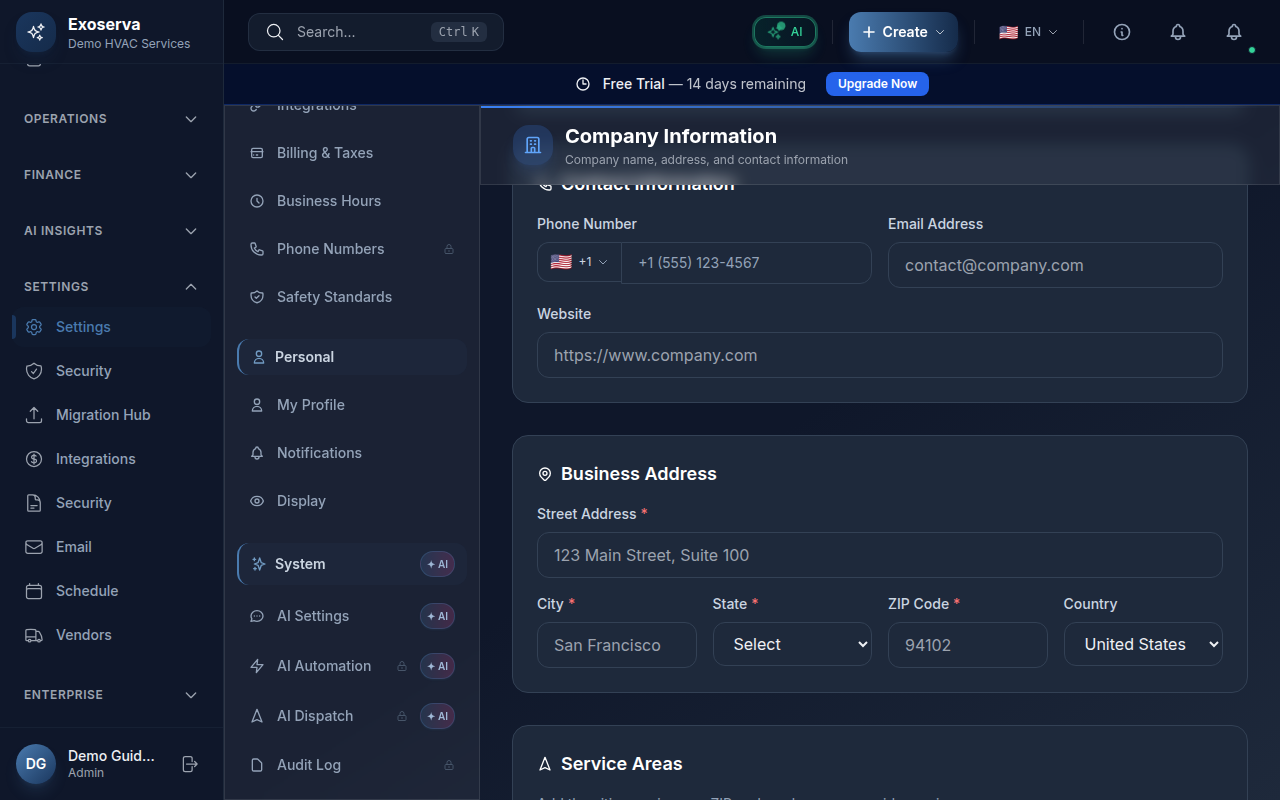
Step 5: Set Your Business Address
Enter your company street address, city, state/province, and zip/postal code. This address appears on invoices, estimates, and other official documents. It is also used as the default starting point for route optimization when dispatching technicians to job sites.
Step 6: Upload Your Company Logo
Click the logo upload area to select an image file from your computer. Supported formats typically include PNG, JPG, and SVG. Your logo will appear on invoices, estimates, proposals, and email communications sent to your customers. For best results, use a high-resolution image with a transparent background.
Step 7: Configure Timezone and Currency
Select your timezone from the dropdown menu. This setting affects how appointment times, scheduling, and date-based reports are displayed throughout the platform. Next, choose your default currency. This determines the currency symbol used on invoices, estimates, and financial reports. Both settings apply globally across your entire workspace.
Step 8: Define Your Service Areas
Configure the geographic areas where your company provides services. You can define service areas by zip codes, city names, or a radius around your business address. Service areas are used by the AI dispatch system to assign jobs efficiently and by the scheduling engine to optimize technician routes.
Step 9: Save Your Changes
After completing all fields, click the “Save” button at the bottom of the form to apply your changes. A success notification will confirm that your company profile has been updated. Your new information will immediately appear on any invoices, estimates, or documents generated going forward.
What’s Next?
Now that you’ve completed this guide, check out:
Need help? Post in the Tech Support category or contact support@exoserva.com.