Keeping track of payments is essential for healthy cash flow. The Exoserva Payments page gives you a centralized view of all transactions, outstanding balances, and payment methods. This guide shows you how to monitor payments, filter by status, handle refunds, export transaction data, and understand your revenue at a glance.
Estimated time: 8 minutes
Before You Begin
- An active Exoserva account with Owner or Manager role
- At least one invoice created (see “Creating and Sending Invoices” guide)
- Recommended: Stripe integration for online payment processing (see “Connecting Stripe Payments” guide)
Step 1: Navigate to the Payments Page
Click “Payments” in the left sidebar under the Financials section. The Payments page opens with a row of summary stat cards at the top and a sortable data table below. The stat cards provide an at-a-glance overview of your payment health, each displayed as a gradient-bordered card with an icon, label, primary value, and optional trend indicator. Card colors indicate meaning: green for completed/collected amounts (with a check-circle icon), yellow for pending amounts (clock icon), orange for failed transactions (alert-triangle icon), and purple for collection rate (displayed as a circular progress ring showing the percentage). Each stat card with a trend arrow shows how the current period compares to the previous equivalent period (up arrow in green means improvement, down arrow in red means decline).
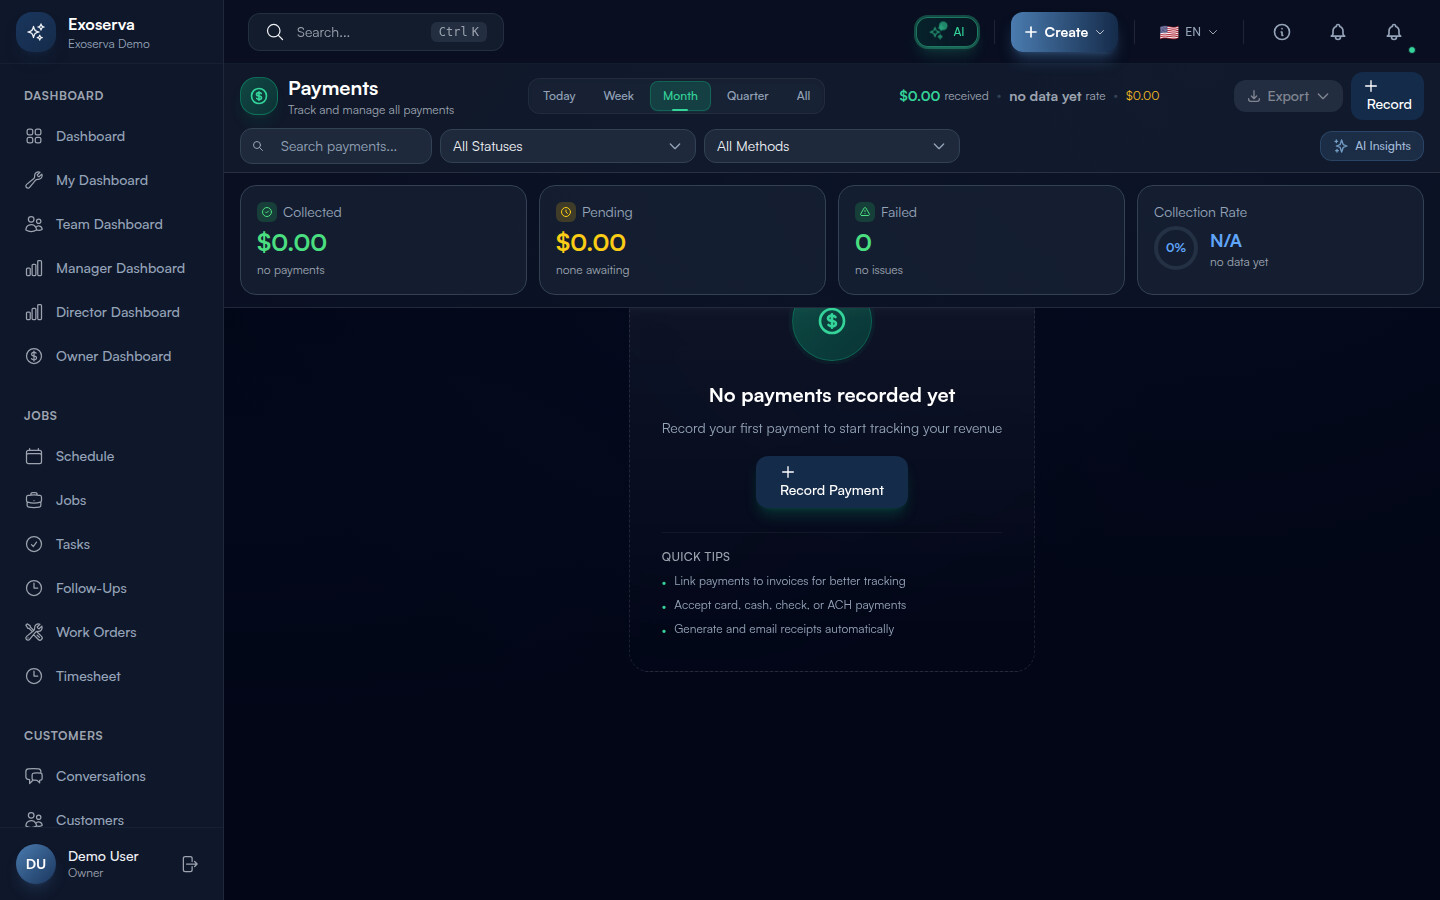
Tip: Click any stat card that has a clickable state (you will see a cursor-pointer and subtle hover animation) to filter the table to that specific status. This is the fastest way to jump to exactly the payments you need to review.
Warning: If the stat cards show pulsing skeleton animations instead of data, the page is still loading from the API. Wait a moment for the data to populate before drawing conclusions about your payment status.
Step 2: View Payment Details
The data table displays all payment transactions in sortable columns: date, customer name, invoice number, amount, payment method, and status. Click any column header to sort ascending; click again for descending. The most recent payments appear at the top by default.
Click any payment row to open the detail modal. This shows the full transaction record including the linked invoice number (clickable link to jump to the invoice detail page), payment method used (card type and last four digits for Stripe payments, or method label for manual entries), exact timestamp, and any notes added during collection. Refund history is also displayed here if applicable, showing each refund amount, date, and reason as a nested list.
Step 3: Filter Payments by Status and Date
Above the data table, the filter bar provides several controls. Status filter buttons let you narrow the list by payment state: All, Completed, Pending, Failed, and Refunded. The active filter button is highlighted with a distinct style. Combine the status filter with the date range selector to view payments for a specific period. Date range options include today, this week, this month, last month, this quarter, or a custom range with start and end date pickers.
Additional filters may include payment method (card, cash, check, bank transfer) and customer or account selectors. The active filter count is displayed as a badge so you can see at a glance how many filters are applied.
Step 4: Record Cash and Check Payments
For payments received outside of Stripe (cash payments at the door, mailed checks, bank transfers), open the associated invoice from the Invoices page and click the “Record Payment” button. A modal dialog opens with the following fields: Payment Method (dropdown with options: Cash, Check, Bank Transfer, or Other), Amount (currency input pre-filled with the outstanding balance), and an optional Reference Number field (text input for check numbers, wire transfer IDs, or other tracking identifiers). Click “Save” to record the payment. The invoice balance updates immediately and the payment appears in the Payments table with the selected method and reference.
Step 5: Handle Refunds
To issue a refund, click a completed payment row in the data table to open the detail modal, then click the “Refund” button. For Stripe payments, a refund dialog appears where you can choose Full Refund (refunds the entire payment amount) or Partial Refund (enter a specific amount less than the total). Add a Reason for the refund in the text field for your records. Click “Confirm Refund” to process. The refund is submitted directly through Stripe and the customer is credited automatically to their original payment method. The payment status changes from “Completed” to “Refunded” (or “Partially Refunded” for partial refunds).
For cash or check payments, record the refund manually by updating the payment notes and adjusting the associated invoice balance.
Step 6: Review the Revenue Summary
At the top of the Payments page, the stat cards collectively serve as your revenue summary dashboard. Key metrics include: Total Collected (green card with check-circle icon, showing the sum of all completed payments for the selected period), Pending (yellow card with clock icon, showing amounts awaiting processing or customer action), Failed (orange card with alert-triangle icon, showing declined or failed transaction totals with an urgent pulse if the count is high), and Collection Rate (purple card with a circular progress ring showing the percentage of invoiced amounts successfully collected).
Each card includes a trend indicator comparing the current period to the previous equivalent period. A growing gap between invoiced amounts and collected amounts (visible when Collection Rate trends downward) signals that accounts receivable aging is increasing.
Step 7: Export Transaction Data
In the toolbar above the data table, click the “Export” dropdown button to download payment records. Available export formats include CSV (for spreadsheet import), Excel (formatted .xlsx file), and JSON (for developer integrations). The export respects your current filters – if you have filtered by status or date range, only the filtered results are exported. To export everything, clear all filters first.
The exported file includes all visible columns plus additional fields like Stripe transaction IDs, invoice references, payment method details, and refund information for comprehensive accounting import. A Print button is also available in the toolbar for generating a formatted printable version of the current view.
What’s Next?
Now that you’ve completed this guide, check out:
Need help? Post in the Tech Support category or contact support@exoserva.com.