Accurate time tracking helps you bill correctly, measure productivity, and manage labor costs. The Exoserva Timesheet feature lets technicians clock in and out, log time against specific jobs, and gives managers a clear view of hours worked. This guide covers the complete time tracking workflow including editing entries, approval processes, and exporting reports for payroll.
Estimated time: 9 minutes
Before You Begin
- An active Exoserva account (Technicians for clocking, Managers/Owners for reporting)
- At least one team member added to your account (see “Adding Team Members” guide)
- Recommended: Jobs created for job-specific time tracking
Step 1: Navigate to the Timesheet Page
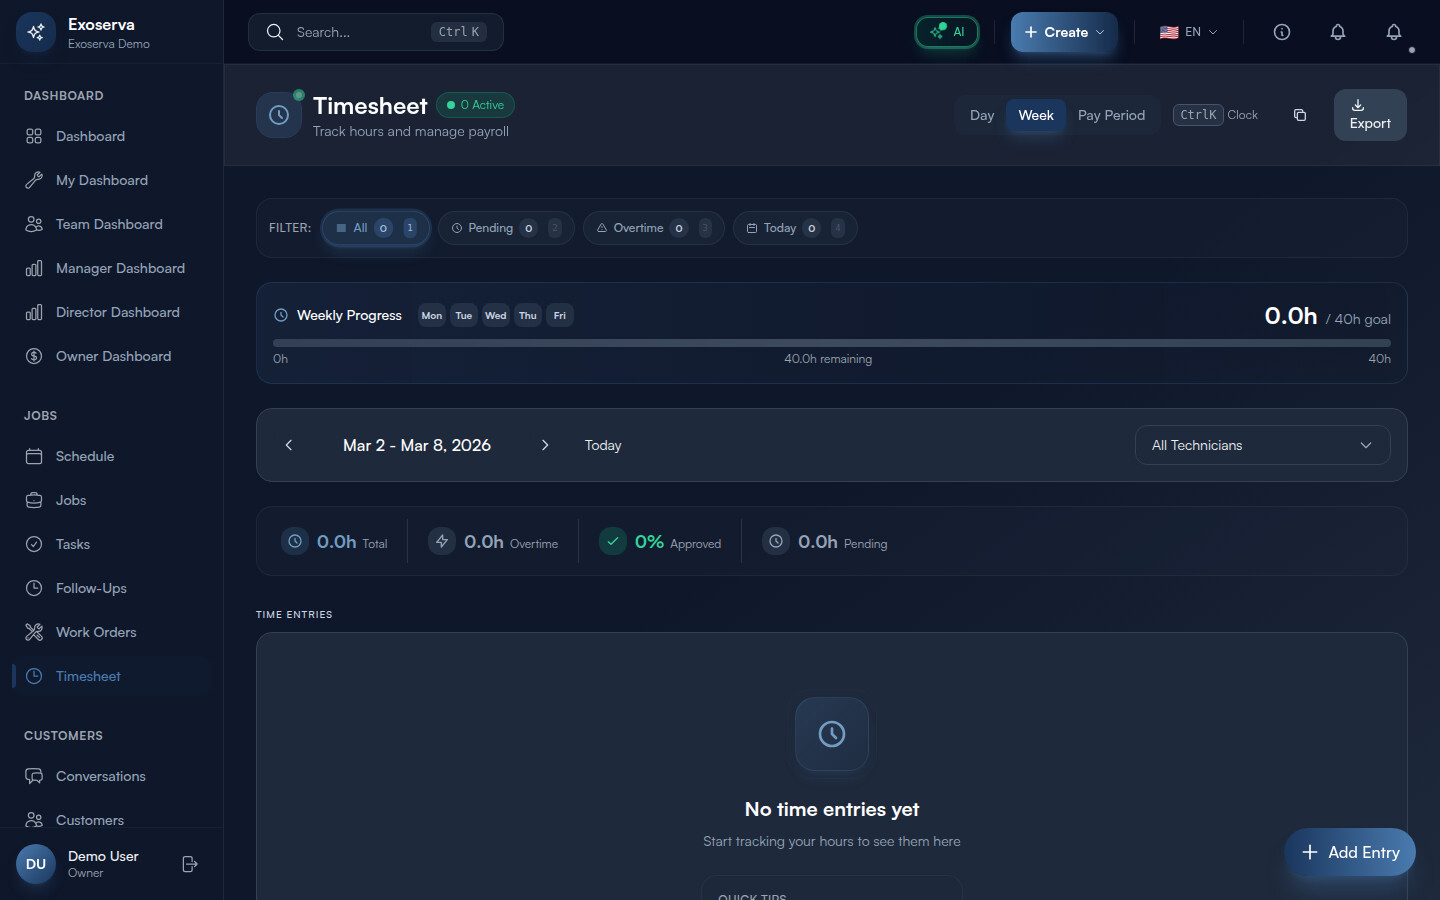
Click “Time” in the left sidebar. The Timesheet page opens with two main areas: a Clock Status banner at the top and a time entries data table below. Technicians see their own personal timesheet with their entries for the current pay period. Managers and Owners see a team-wide view with additional controls: a technician dropdown selector to view individual timesheets, a date range navigator (with left/right arrows to move between weeks), a view mode switcher (Day, Week, Bi-Weekly, or Month views), and an “Export” button in the toolbar.
Above the data table, you will see quick-filter status buttons: All (shows total entry count badge), Pending (shows count of entries awaiting approval), Overtime (shows count of entries with overtime hours), and Today (shows count of today’s entries). Click any filter button to narrow the table instantly.

Tip: Managers can toggle between individual and team views using the technician selector dropdown. Selecting “All” shows a summary row for each team member, making it easy to compare hours worked across your entire team for the selected period. Use keyboard shortcuts: press 1 through 4 to quickly switch between the All, Pending, Overtime, and Today filters without touching the mouse.
Warning: The date range navigator defaults to the current week. Make sure you are viewing the correct period before reviewing entries – it is easy to accidentally review last week’s data if you navigated away previously.
Step 2: Clock In and Clock Out
At the top of the Timesheet page, the Clock Status banner displays your current time clock state in a gradient-bordered card. When you are not clocked in, the banner shows “Not Clocked In” with the prompt “Ready to start your day?” and a large primary-colored “Clock In” button (with a log-in icon).
Click “Clock In” to start your shift. The banner transforms: the clock icon turns green with a pulsing dot, the text changes to “Currently Clocked In,” a GPS verification badge appears (blue “Verified” label with a map-pin icon confirming your location was recorded), and a live timer starts counting up in large monospace font with a green glow effect (e.g., “2h 34m 12s”). The timer updates every second in real time.
When your work is done, click the red “Clock Out” button (with a log-out icon). A success toast confirms “Clocked out successfully” and the banner reverts to the “Not Clocked In” state. The system records exact timestamps and calculates total hours automatically.
Step 3: Take a Break
While clocked in, a secondary “Break” button (with a coffee icon) appears next to the Clock Out button. Click it to start a break. The button text changes to “End Break” and a break indicator appears below the clock status: an amber-bordered badge showing a coffee icon, “On break” text, and a note that “Break time is paused.” The break button toggles – click “End Break” to resume your clock.
Break time is tracked separately from regular work time. You can use the keyboard shortcut Ctrl+B (or Cmd+B on Mac) to toggle breaks quickly.
Step 4: View Time Entries
The main section of the Timesheet page displays individual time entries in a data table. The table columns include: Date (shown with weekday abbreviation, month, day, and year), Technician (visible in manager view, showing technician name), Start Time, End Time, Total Hours (calculated duration), Overtime (hours exceeding the standard threshold, highlighted if present), Type (Regular, Overtime, or Break), Status badge (Pending in amber, Approved in green, Rejected in red), and Notes (any notes added to the entry).
Entries are sortable by any column. The quick-filter buttons above the table (All, Pending, Overtime, Today) narrow results based on the selected criterion, with each button showing a count badge so you can see how many entries match each filter at a glance.
Step 5: Edit Time Entries
Click any time entry row in the data table to open the edit modal. The modal displays editable fields for: Date (date picker), Start Time (time input), End Time (time input), Associated Job (dropdown to link the entry to a specific job), Type (dropdown: Regular, Overtime, Break), and Notes (textarea). Modify any field as needed. If an entry was created by mistake, click “Delete Entry” to remove it. Click “Save” to persist your changes. A success toast confirms “Time entry updated.”
All edits are logged with a timestamp and the user who made the change, creating an audit trail for payroll accountability.
Step 6: Review and Approve Timesheets
Managers and Owners can review and approve time entries from the Timesheet page. Use the “Pending” quick-filter button to show only entries awaiting review – the badge count shows how many entries need attention. Each pending entry’s row includes “Approve” and “Reject” action buttons (or they appear when you click the row to open the entry detail).
Click “Approve” to confirm a time entry – a success toast shows “Time entry approved” and the status badge changes to green “Approved.” Click “Reject” (or “Return for Correction”) to send it back to the technician with a note about what needs fixing – a toast confirms “Time entry rejected” and the status changes to red “Rejected.” For bulk approval, use the batch approve action in the toolbar to approve all pending entries at once. A confirmation toast shows “Approved X entries.”
Step 7: Review the Weekly Summary
Switch to the Week view mode using the view mode selector in the toolbar. The weekly summary displays aggregated hours for the selected period. Summary statistics appear at the top or in the toolbar area showing: Total Hours (aggregate for the entire period), Regular Hours versus Overtime Hours breakdown, and the date range label (e.g., “Feb 24 - Mar 2, 2026”).
The data table in week view groups entries by day with subtotals, making it easy to identify which days had the most work and whether overtime patterns emerge on specific days of the week. The date range navigator arrows let you quickly move between weeks for comparison.
Step 8: Export Time Reports
Click the “Export” button in the toolbar to open the export dialog. Choose from three export formats: CSV (for spreadsheet and payroll import), PDF (formatted summary suitable for client billing, compliance records, or printing), and QuickBooks (formatted specifically for QuickBooks payroll import). Select the date range, choose an individual technician or the entire team, and click the export button for your chosen format. A success toast confirms “Exported to [FORMAT]” and the file downloads automatically.
The CSV export includes all entry details: date, technician name, start time, end time, total hours, overtime hours, break duration, associated job number, entry type, status, and notes. The PDF format provides a formatted summary with company branding suitable for sharing with clients or attaching to compliance documentation.
What’s Next?
Now that you’ve completed this guide, check out:
Need help? Post in the Tech Support category or contact support@exoserva.com.