Exoserva connects with the tools you already use. The Integrations Hub in Settings lets you connect Google Calendar for scheduling sync, Stripe for payment processing, QuickBooks for accounting, and more. This guide gives you an overview of available integrations and how to access them.
Estimated time: 6 minutes
Before You Begin
- An active Exoserva account with Owner or Admin role
- Accounts with the services you want to integrate (Google, Stripe, QuickBooks, etc.)
Step 1: Navigate to Integrations
Click “Settings” in the left sidebar, then click the “Integrations” card (link icon) under the Operations category (emerald accent border). The Integrations page displays all available integrations as a responsive 2-column card grid (single column on mobile). Each integration card is a clickable Link element styled as a rounded container with a grey border that highlights to the primary color on hover, providing clear interactive feedback.
Each card follows a consistent layout: a colored icon container (a 48x48 rounded square with the service’s brand color as a translucent background), the service name in bold white text (which transitions to the primary color on hover), a description in grey text below the name, and a chevron-right arrow on the far right indicating that clicking will navigate to the integration’s dedicated configuration page. The available integrations are: Thumbtack, QuickBooks, Voice AI, Calendar (Google Calendar and Outlook), E-Signatures (DocuSign and HelloSign), Google Business Profile, and SEO Integrations.
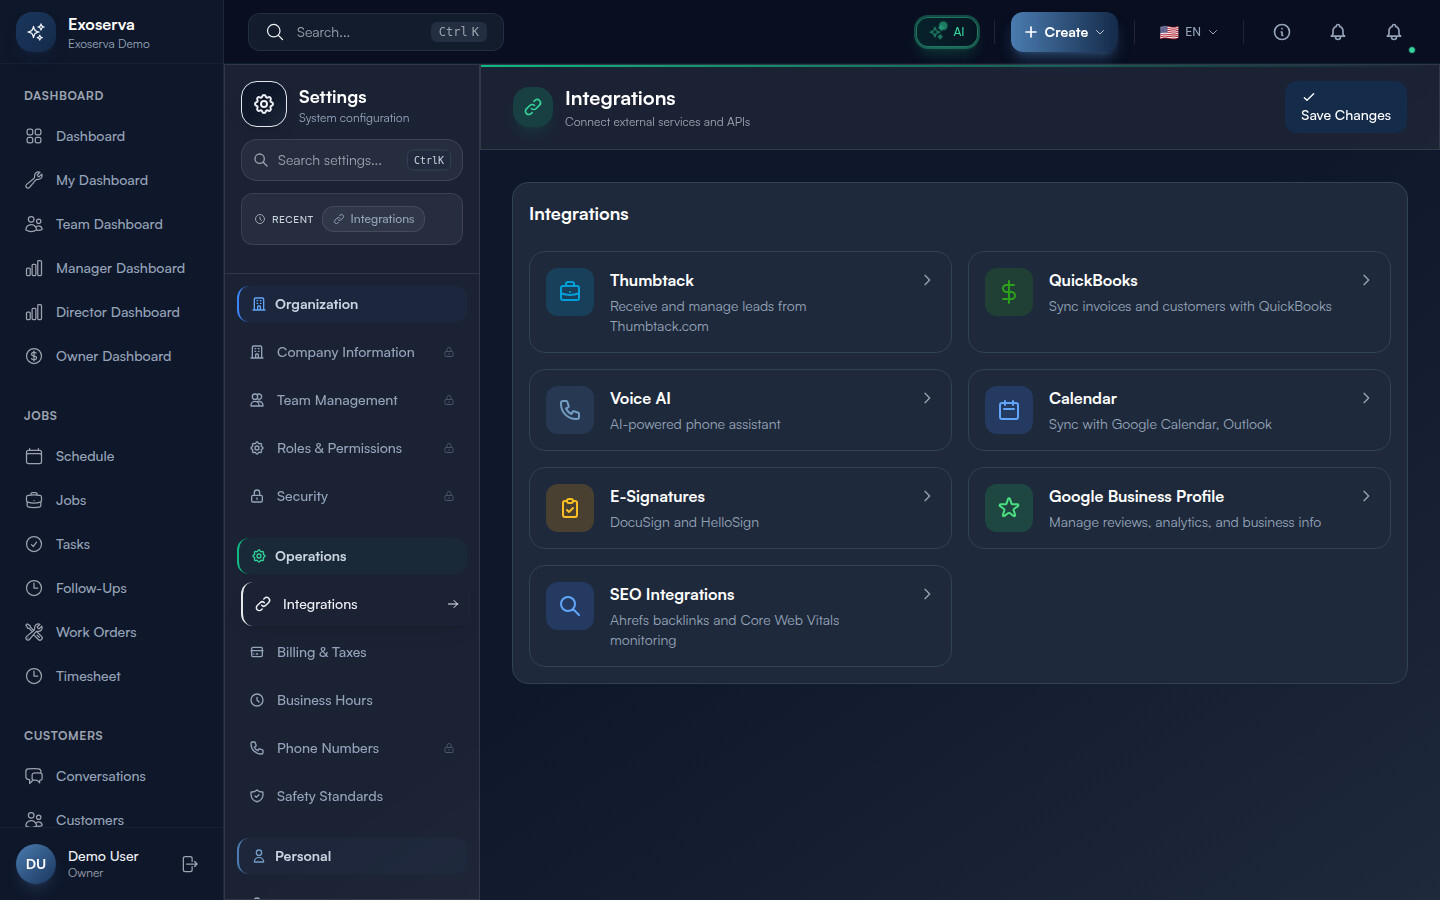
Tip: The integration cards are organized by frequency of use. The most commonly connected services (Thumbtack for leads, QuickBooks for accounting) appear first. Scroll down to see specialized integrations like E-Signatures and SEO.
Step 2: View Integration Card Details
Each integration card on the hub page displays its current status visually. The Thumbtack card (briefcase icon in cyan #009FD9 on a cyan-tinted background) shows the description “Receive and manage leads from Thumbtack.com.” The QuickBooks card (dollar-sign icon in green #2CA01C on a green-tinted background) shows “Sync invoices and customers with QuickBooks.” The Voice AI card (phone icon in primary blue on a blue-tinted background) shows “AI-powered phone assistant.” The Calendar card (calendar icon in blue on a blue-tinted background) shows “Sync with Google Calendar, Outlook.”
The E-Signatures card (clipboard-list icon in amber on an amber-tinted background) shows “DocuSign and HelloSign.” The Google Business Profile card (star icon in green on a green-tinted background) shows “Manage reviews, analytics, and business info.” The SEO Integrations card (search icon in blue on a blue-tinted background) shows “Ahrefs backlinks and Core Web Vitals monitoring.” Click any card to navigate to its dedicated settings page with full configuration options.
Step 3: Google Calendar Integration
Click the “Calendar” card to navigate to the Calendar Integrations settings page. The page supports two calendar providers: Google Calendar and Microsoft Outlook, each displayed as a separate connection card. For Google Calendar, click the “Connect” button to initiate the OAuth flow. A popup window (600x700 pixels) opens to the Google authorization page where you sign in with your Google account and grant Exoserva access to manage your calendar events.
Once connected, the card displays your Google email address, the connected calendar name, a “Last Synced” timestamp, and a sync status indicator. The sync configuration options include: Sync Direction (one-way import, one-way export, or two-way bidirectional), Auto Sync toggle, Sync Interval (dropdown with configurable minute intervals), Import Events toggle (bring Google Calendar events into Exoserva), Export Jobs toggle (push Exoserva jobs to Google Calendar), Export Estimates toggle, Block Time Slots toggle (mark busy times from Google Calendar as unavailable for scheduling), Show Job Details toggle (include full job information in calendar events), and Reminder Minutes (dropdown for event notification timing). A Sync History section at the bottom shows a log of recent sync events with status, record counts, and any errors.
Warning: The OAuth popup may be blocked by your browser’s popup blocker. If the authorization window does not appear after clicking “Connect,” check your browser’s popup settings and allow popups from the Exoserva domain.
Step 4: Stripe Payment Integration
The Stripe integration is configured through the “Billing & Taxes” section in Settings (credit-card icon). Click the Stripe connection card to initiate the OAuth flow, which redirects you to Stripe’s authorization page. Sign in with your Stripe account credentials and authorize Exoserva to process payments on your behalf. The OAuth flow uses the same popup pattern as calendar integrations (a centered popup window) and polls for completion at regular intervals.
When connected, Exoserva adds a “Pay Now” button to all invoices sent to customers. Customers click this button to pay with credit card, debit card, or ACH bank transfer through Stripe’s secure checkout. Payments are recorded automatically in Exoserva and linked to the corresponding invoice, updating the payment status from “Unpaid” to “Paid.” The integration configuration shows your connected Stripe account name, the last four digits of the connected bank account, and a “Disconnect” option.
Step 5: QuickBooks Accounting Integration
Click the “QuickBooks” card on the Integrations hub page to navigate to the dedicated QuickBooks Online settings page. When disconnected, the page displays a hero section prompting you to connect. Click “Connect to QuickBooks” to initiate the Intuit OAuth flow, which opens a popup window for authorization. After granting access, the page displays your connected company name, Realm ID, connection status, and a health score indicator with five tiers: Excellent (green, 5 dots), Good (blue, 4 dots), Warning (yellow, 3 dots), Critical (red, 2 dots), and Disconnected (grey, 1 dot).
The QuickBooks settings page is organized into entity sync cards for each data type: Customers, Invoices, Payments, and Items. Each card shows the last sync timestamp, record counts (created, updated, failed), and a “Sync Now” button. The Sync History section at the bottom shows a chronological log of all sync events with their status (success/failed), direction (import/export), entity type, record counts, duration, and any error messages. A quick stats bar at the top provides at-a-glance metrics for recent sync activity.
Step 6: Monitor Sync Status
Each connected integration provides sync monitoring capabilities accessible from its dedicated settings page. The Calendar integration page shows a Sync History table with columns for sync type, direction, events created/updated/deleted, jobs created/updated/deleted, errors, duration (in milliseconds), status, and timestamps. Status indicators use color coding: a green indicator means successful completion, yellow means partial success with warnings, and red means the sync failed with errors that need attention.
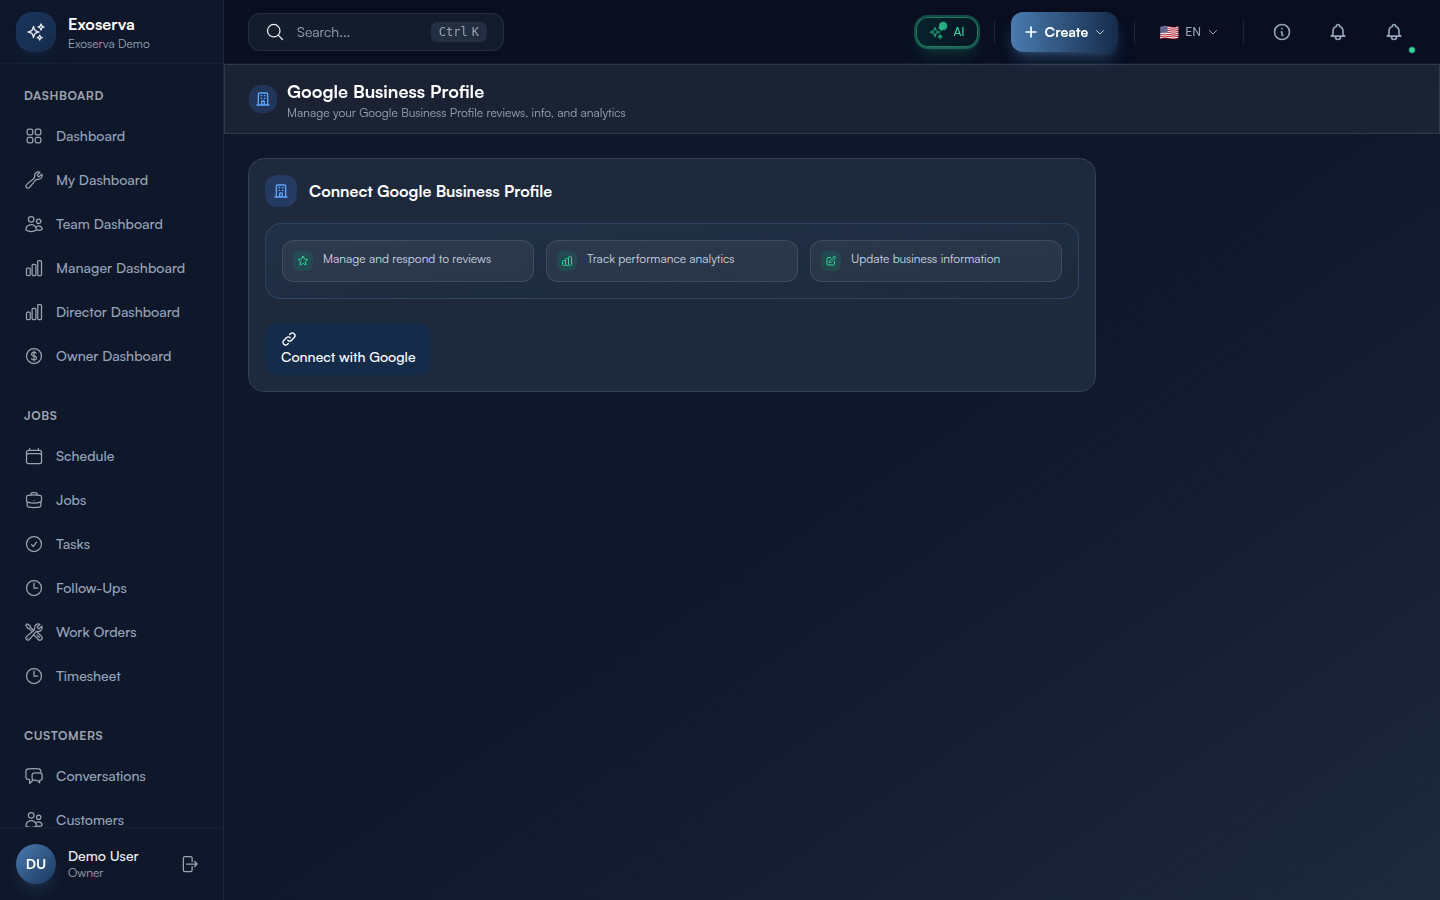
The QuickBooks integration uses a sophisticated health scoring system defined in QB_HEALTH_SCORING constants. The overall health is calculated from multiple factors and displayed as a tiered indicator with colored dots (5 for excellent down to 1 for disconnected). Each entity sync card (Customers, Invoices, Payments, Items) shows inline sync results with created/updated/failed counts after each sync operation. The Google Business Profile integration shows its own sync status and error indicators on the GBP settings page, including review sync timestamps and analytics data freshness.
Step 7: Troubleshoot Disconnected Integrations
If an integration shows a “Disconnected” or error status on its settings page, click the integration card to view the specific error message. The most common causes are: expired OAuth tokens (Google and QuickBooks tokens have limited lifespans and must be refreshed), revoked permissions (someone removed Exoserva’s access from the third-party service’s settings), or changed account credentials (password was reset on the external service). The Google Business Profile integration page shows detailed status fields including syncError text and needsReauth flag when re-authorization is required.
To reconnect, click the “Reconnect” or “Connect” button on the integration’s settings page. This initiates a fresh OAuth flow – you will be prompted to sign in to the external service and re-grant permissions. After successful re-authorization, the integration status updates to “Connected” and sync resumes automatically. For QuickBooks, the health indicator will recover from “Disconnected” or “Critical” back to “Good” or “Excellent” after a successful re-sync. Integration setup access is restricted to Owner and Admin roles for security.
What’s Next?
Now that you’ve completed this guide, check out:
Need help? Post in the Tech Support category or contact support@exoserva.com.